In this guide, you will learn how to configure product images in RMH and WebSell software so they can be synchronized with your WebStore.
1. Set Up the Product Image Directory
Before assigning product images, you need to create a central folder where all images will be stored.
- Create a shared network folder with read and write permissions.
(It’s recommended to consult your IT team to ensure proper access for all users and systems.) - This ensures that both RMH and WebSell applications can access the images.
2. Configure Image Path in RMH
- Open RMH Store Administrator (or RMH Headquarters Administrator for RMH Central Users ).
- Go to:
- File → Configuration
- In the configuration window:
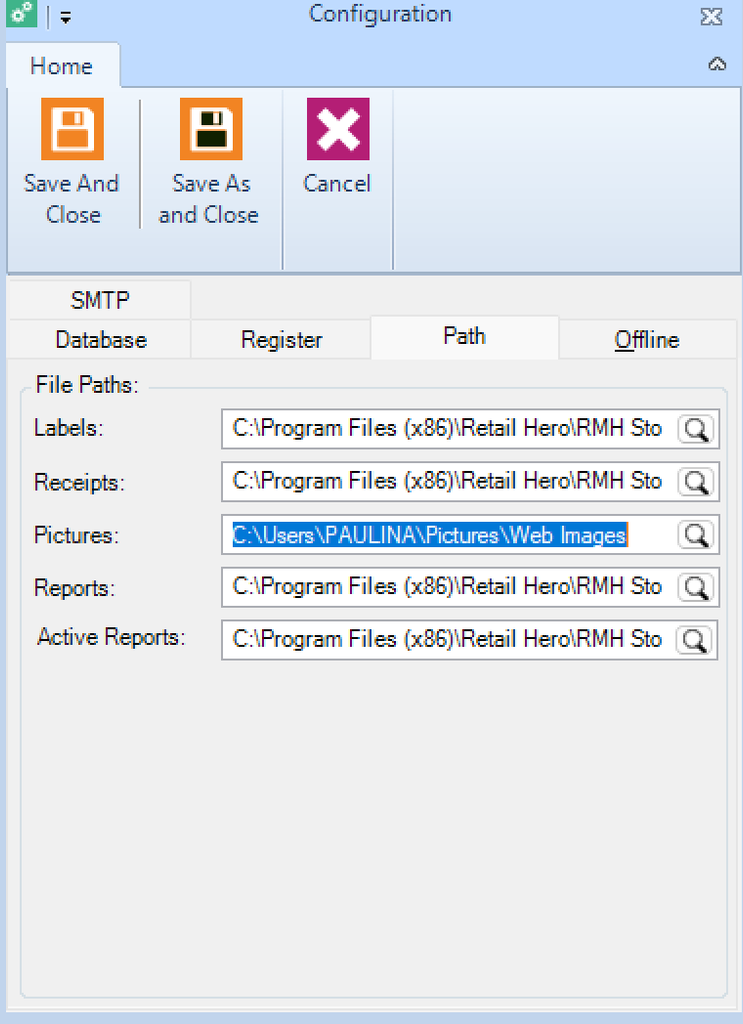
- Select the Paths tab.
- Locate the Pictures field.
- Click the magnifying glass icon.
- Browse to and select your shared image folder.
This sets the default location for product image storage.
3. Configure Image Profiles in WebSell Sync
- Open WebSellSync (Sync Server Edition for HQ users).
- Go to:
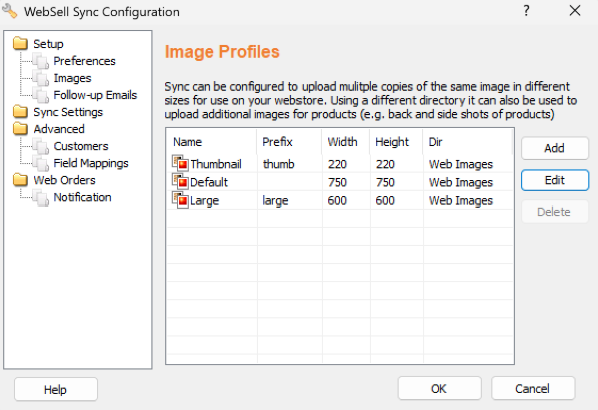
- Configuration → Images
- Review the default image profiles:
- Default
- Thumbnail
- Large
Notes:
- If the directory path is incorrect:
- Select the profile you want to update.Click Edit, then update the path.Use the Three dots (…) to browse and select the correct directory from your PC or network location.
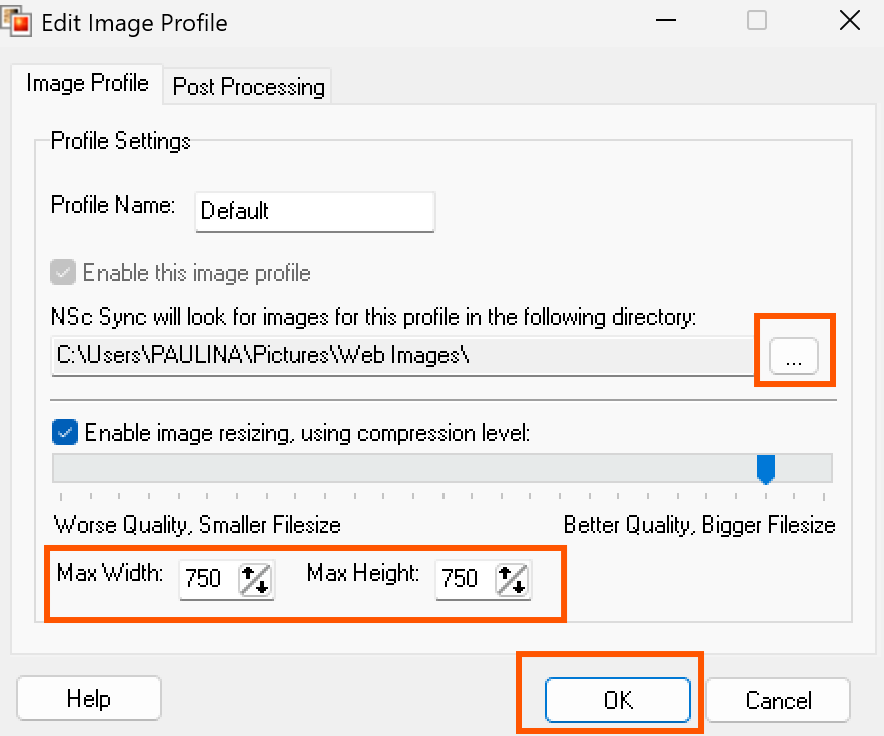
- You can also adjust:
- Width and Height for each image profile.
Compression level using the slider
4. Assign Product Images in PAM
Enable Image Assignment
Open PAM.
Go to: Options → Show Extended Attribute Editor to display Item Picture area along with Extended Description
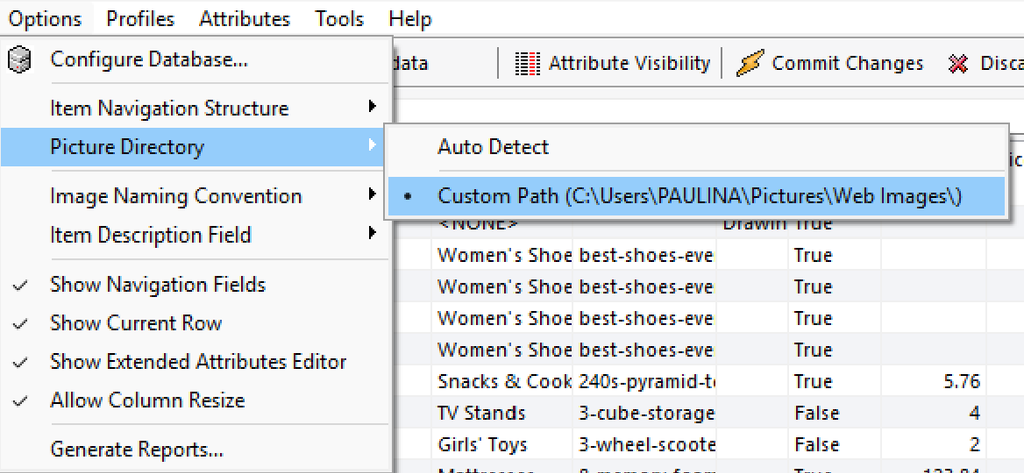
Verify that the Picture Directory configured in PAM (Options → Picture Directory) matches the directory set in RMH Administrator and WebSell Sync.The directory can be configured in one of two ways:
- Auto Detect – PAM automatically uses the system-defined path
- Custom Path – manually set to a specific local or network directory
5. Assign Images to Products
You can assign images in two ways:
Option 1: Drag & Drop
- Select an item in PAM by clicking on it
- Drag an image file directly into the Item Picture area in the upper right corner of PAM.
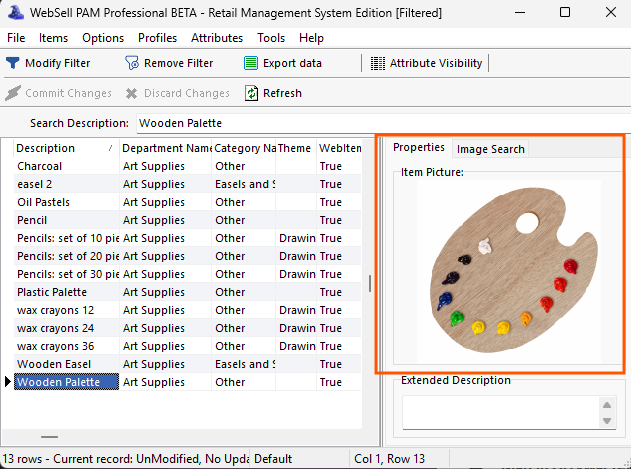
Option 2: Manual Selection
- Click “No Image” → “Click to assign one”.
- Browse the configured image folder.
- Select the appropriate image for the selected item.
Save Changes
- The PictureName field will automatically populate with the image filename.
- Click Commit Changes to save.
- Run synchronization in WebSell Sync to update your webstore.
5. Image Naming Convention
You can control how images are named in PAM:
- Go to:
- Options → Settings → Image Naming Convention
- Choose one of the following:
- Item Lookup Code (e.g.,
12345.jpg) - Item Description (e.g.,
blue-running-shoes.jpg) - Filename (e.g. t-shirt.jpg)
Recommendation:
- Use Item Description for better SEO performance.
- Use Item Lookup Code for simplicity and consistency.
6. Image Search Functionality
PAM allows you to search and assign images stored locally.
- If you want to:
- Search images online
- Use supplier-hosted image libraries
Please contact WebSell Support to enable this feature.