The Product Attribute Manager (PAM) is a WebSell software that allows you to manage and organize the attributes or characteristics of your products. Attributes are specific details or properties that describe a product and help customers make informed purchasing decisions.
Configuring the PAM database
Steps:
- From the PAM Options menu, click Configure Database.
- Under Available servers select the computer that contains the database. Alternatively, enter the relevant hostname or IP address.
- Click Next.
- If the database is on the computer you're using, select I will authenticate using Windows Authentication. Otherwise, select I will authenticate using SQL Server authentication with the following credentials and enter your database username and password. If you do not know your database credentials, please reach out to your reseller.
- Click Next to connect to the computer and you will see a list of databases available on it. Under Available databases, select the one you wish to use.
- Click Next to test your settings. If the configuration is successful, you will see a message indicating the database setup has been completed.
- Click Finish to save your settings and exit the wizard.
How to Use PAM
In PAM, items are presented in a spreadsheet view, which is designed to make editing as streamlined as possible.

Each row shows an item in your POS.
Columns show attributes of items.
ItemLookupCode, Description, Department Name, and Category Name are shown by default.
The display of other attributes can be controlled by going to Attributes > Attribute Visibility.
Sorting
You can sort displayed products by clicking column headers. To sort in ascending order, click a header once.
To sort in descending order, click a header twice.
Searching
You can use the search to find items using the selected column. To search, follow this guide:
- Select the column you want to search by clicking on it.
- The label next to the Search Description field changes to reflect the selected column.
- Enter the text you want to search for.
- PAM automatically selects the first match for that text.
Filtering
You can use filtering to manage distinct groups of items. With a filter enabled, only the products that match the criteria specified in that filter are shown. By default, inactive items are not shown.
Note
Filters will always default to the value Inactive=false.
Once the Enable Filter button is clicked and a filter is configured, this button changes to Modify Filter. Click Modify Filter to change the current filter. Click Remove Filter to remove the current filter.
To enable a filter, follow these steps:
1. Click Enable Filter.
2. The Filter window is displayed.
3. Select the Field (attribute) that you want to use to filter products. In the example below we'll use Description.
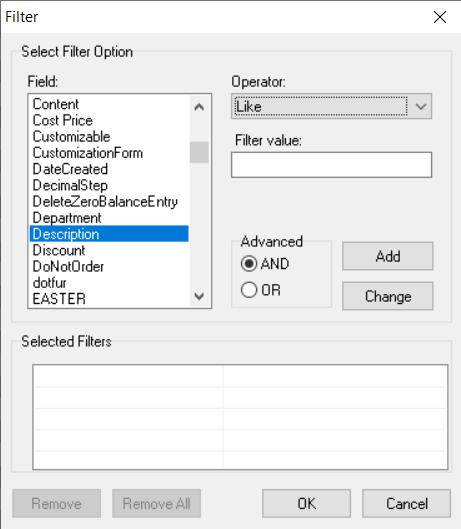
4. Select the Operator to use. The operator specifies how to filter with the selected Field. To compare text, select the Like operator. This is appropriate in this case because Description is a text field.

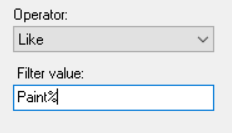
5. Enter the Filter value to be compared with the Field. Note: The % symbol at the end of the Filter value means that any text beginning with "Paint" will match.
7. Click Add to add the newly entered filter to the Selected Filters list.

8. The Selected Filters box lists all the filters currently in use.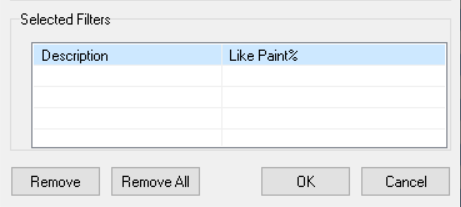
9. Click OK to apply the filter.
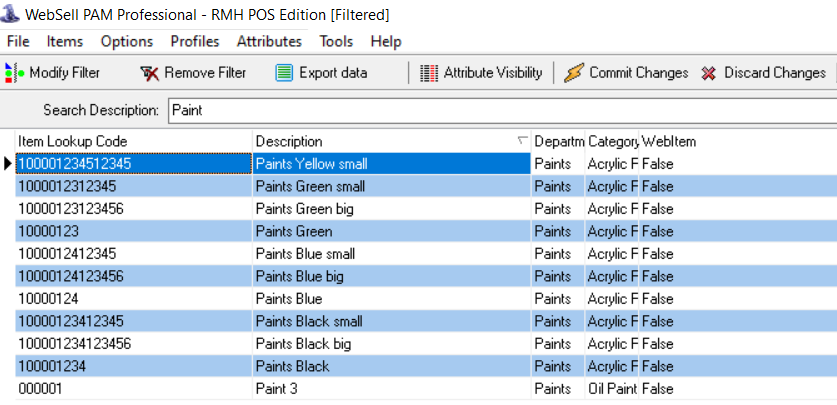
10. As a result, only items with Descriptions beginning with "Paint" are displayed.
11. To remove a filter, click the Remove button, and click OK.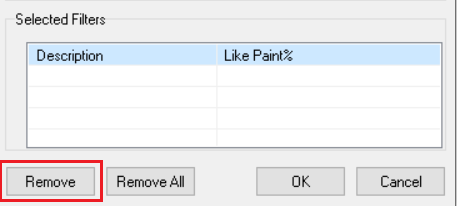
The Status Bar
The status bar shows miscellaneous information about PAM including:
The number of rows (items) visible.
Information about the selected item.
The current user profile, which is a saved snapshot of a set of item attributes. To save a profile or to switch between profiles from the PAM menu, select Profiles.
The indices of the selected row and column.