Enhance your online store by incorporating blog content, which can be utilized to inform your customers about business updates and product offerings. Blog entries play a pivotal role in directing traffic to your website through various channels:
- Enhance the Search Engine Optimization (SEO) of your store.
- Empower you to narrate stories that effectively convert visitors into customers.
- Amplify customer engagement and interaction levels.
Learn more about how blogging can help you grow your business.
Or get inspired for your own blog by checking out the
WebSell blog
.
Grow your sales
So, how do you create a blog on your WebSell webstore? Let's find out!
To start creating blog pages, follow these steps:
- Log in to your WebStore Manager.
- Go to Design & Content > Content.
- Click the Blog tab.
Creating a blog category
- Your blog can be a simple list of articles or you can categorize your articles into blog categories.
- Behind the scenes blog categories and blog articles are the same except for the fact that articles can belong to blog categories.
- This allows you to group similar blog articles together.
To create a blog category, do the following:
- Click Add new page.
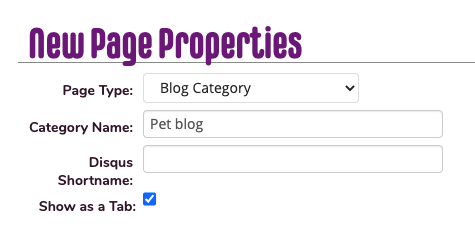
- Choose Blog Category as the page type.
- Name your category.
- Enter the Disqus shortname, this will allow your shoppers to comment on your blog articles; to enable it, you need to create a Disqus account.
- Tick Show as a Tab to add a new link to the tab bar at the top of your store.
- When you click Save, the editor will allow you to add an introductory text to the category. This will be displayed at the top of the category page before the article listing.
Creating a blog page
To create a blog page, do the following:
- Click Add new page.
- Choose Blog Article as the page type.
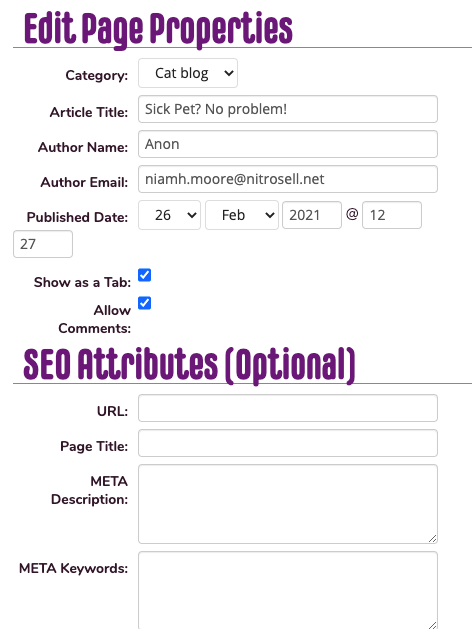
- Select the Blog Category, you will need to create a category before creating an article.
- Name your blog page.
- Enter the author's name and email address.
- Tick Show as a Tab to add a new link to the tab bar at the top of your store.
- Tick Allow Comments to let shoppers reply to blog articles.
Organising blog articles and categories
- The Blog Manager gives a quick overview of your store blog.

- You can change the names of articles by clicking the article title.
- You can edit articles by clicking the pencil icon.
- Articles that are currently live are shaded green, you can change this by clicking the eye icon.
- You can move articles between categories using drag and drop.
Note: The order of articles inside a category is determined by their date, not by the order they appear here.
Interacting with blog articles
- Once your blog is up and running, your blog should look something like this:
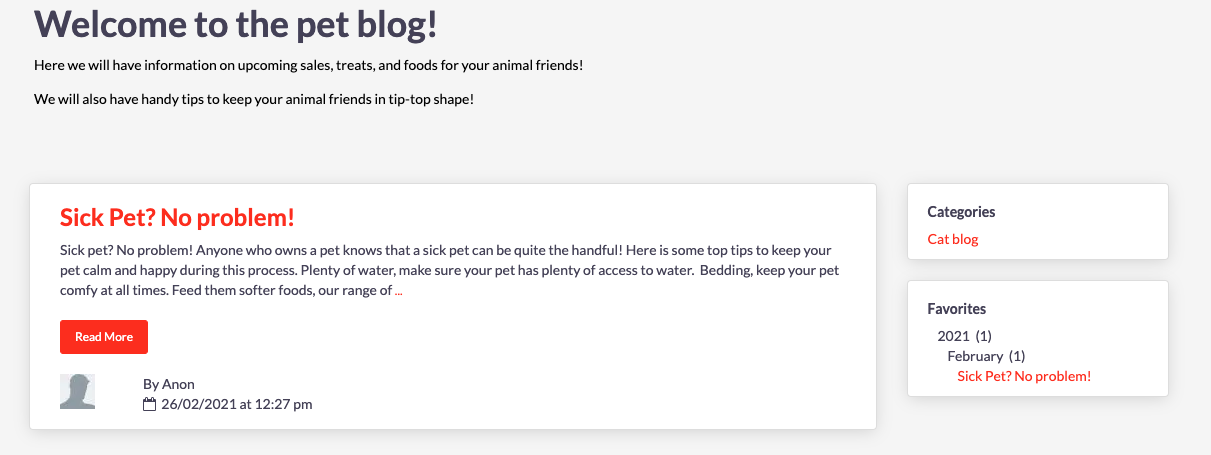
- Shoppers can look through the available categories and articles.
- If you ticked the Show as a Tab checkbox, shoppers can comment on these articles.
Page content management
- Go to Page Content, click on the one you want to modify and the editor will open up so you can modify your text.
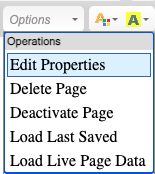
- If you want to change the properties — enable/disable comments, change the author email, change the blog category, or enable/disable a tab link — or even delete the article/category, you can do it from the dropdown on the right-hand-side of the editor’s menu bar (highlighted in the image above).
FAQs
Q. Explain how to find the blog posts that were created as extra tabs on the home page and how do you delete these?
- A: If you go to the content management page you can now see a blog tab. In there you can edit or show/ hide blog articles. To delete them you need to go to the blog tab, click the article you wish to edit(delete) and on the edit page, remove the article using the drop down menu.
Q. Is it possible move photos around within the article? I’m able to input them, but I’m not able to resize them or move them once they are in the article.
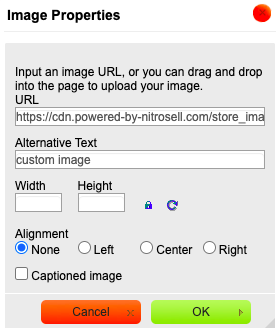
- A: Click the image and select Image Properties or double click on the image.
- Change the size, alignment, alternative text.
