
FedEx is a leading name in global shipping and logistics, renowned for its reliable and fast delivery services. They offers a comprehensive range of shipping solutions, including express, freight, ground and international. FedEx provides a Rate API which allows live and accurate shipping rate calculations on your web store's basket and checkout. This guide will step you through setting up FedEx for the first time, but will also assist those migrating from the legacy Web Services integration. If you need any assistance, we recommend you open a ticket with our support team.
FedEx Web Services Migration (2024)
FedEx Web Services will be disabled on August 31st, 2024. In order to continue retrieving rates for your FedEx shipping methods, you must migrate to the new FedEx Rates REST API.
Getting Started
In order to use the new FedEx service, you must have a FedEx account set up. If you already have an account on fedex.com or developer.fedex.com, then you can use this account for this guide. You will also need a Shipping Account setup, connected with an API project. We will step you through setting up everything from scratch, if you have not already done so.
Set up a FedEx Account
- Visit the FedEx Developer Portal https://developer.fedex.com/api/en-us/home.html
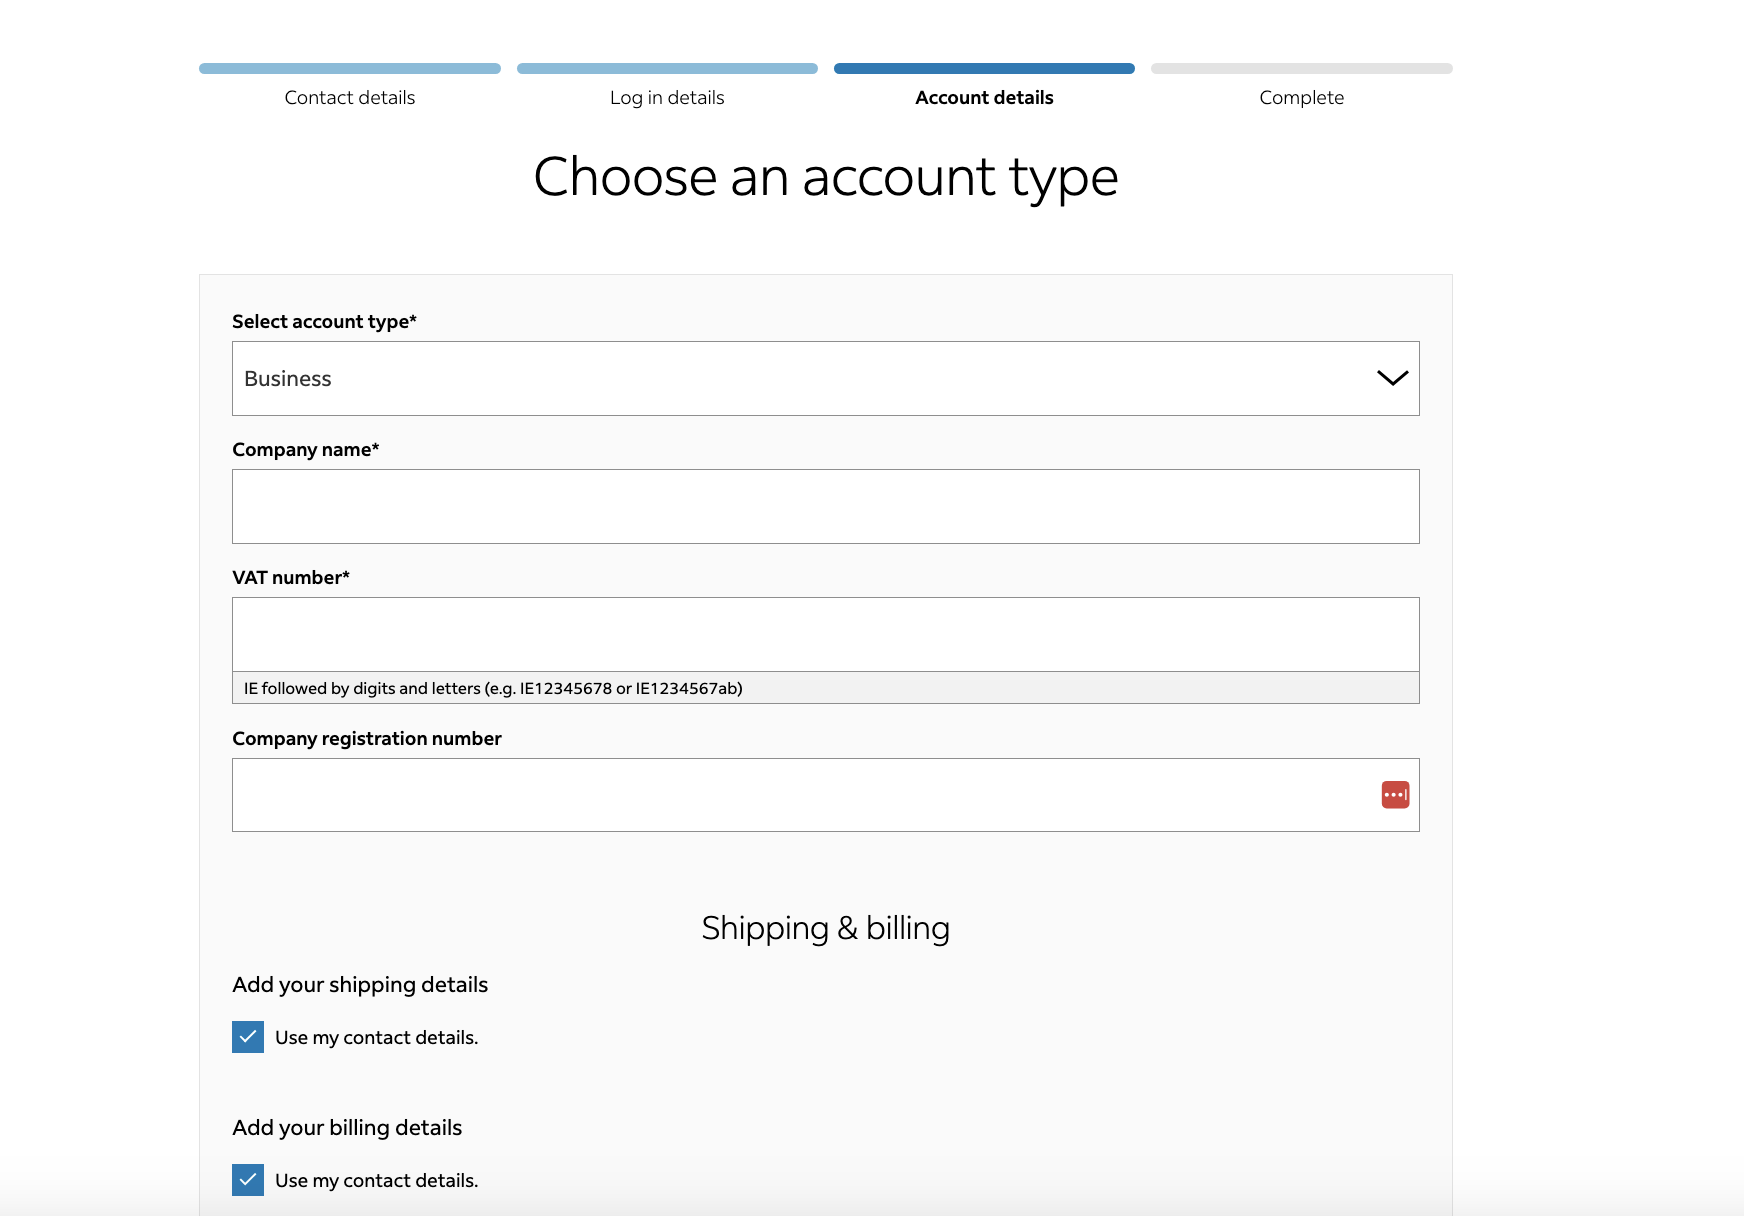
- Click Sign Up if you do not already have an account. Fill in the details and create your new account. Please ensure your address details are correct.
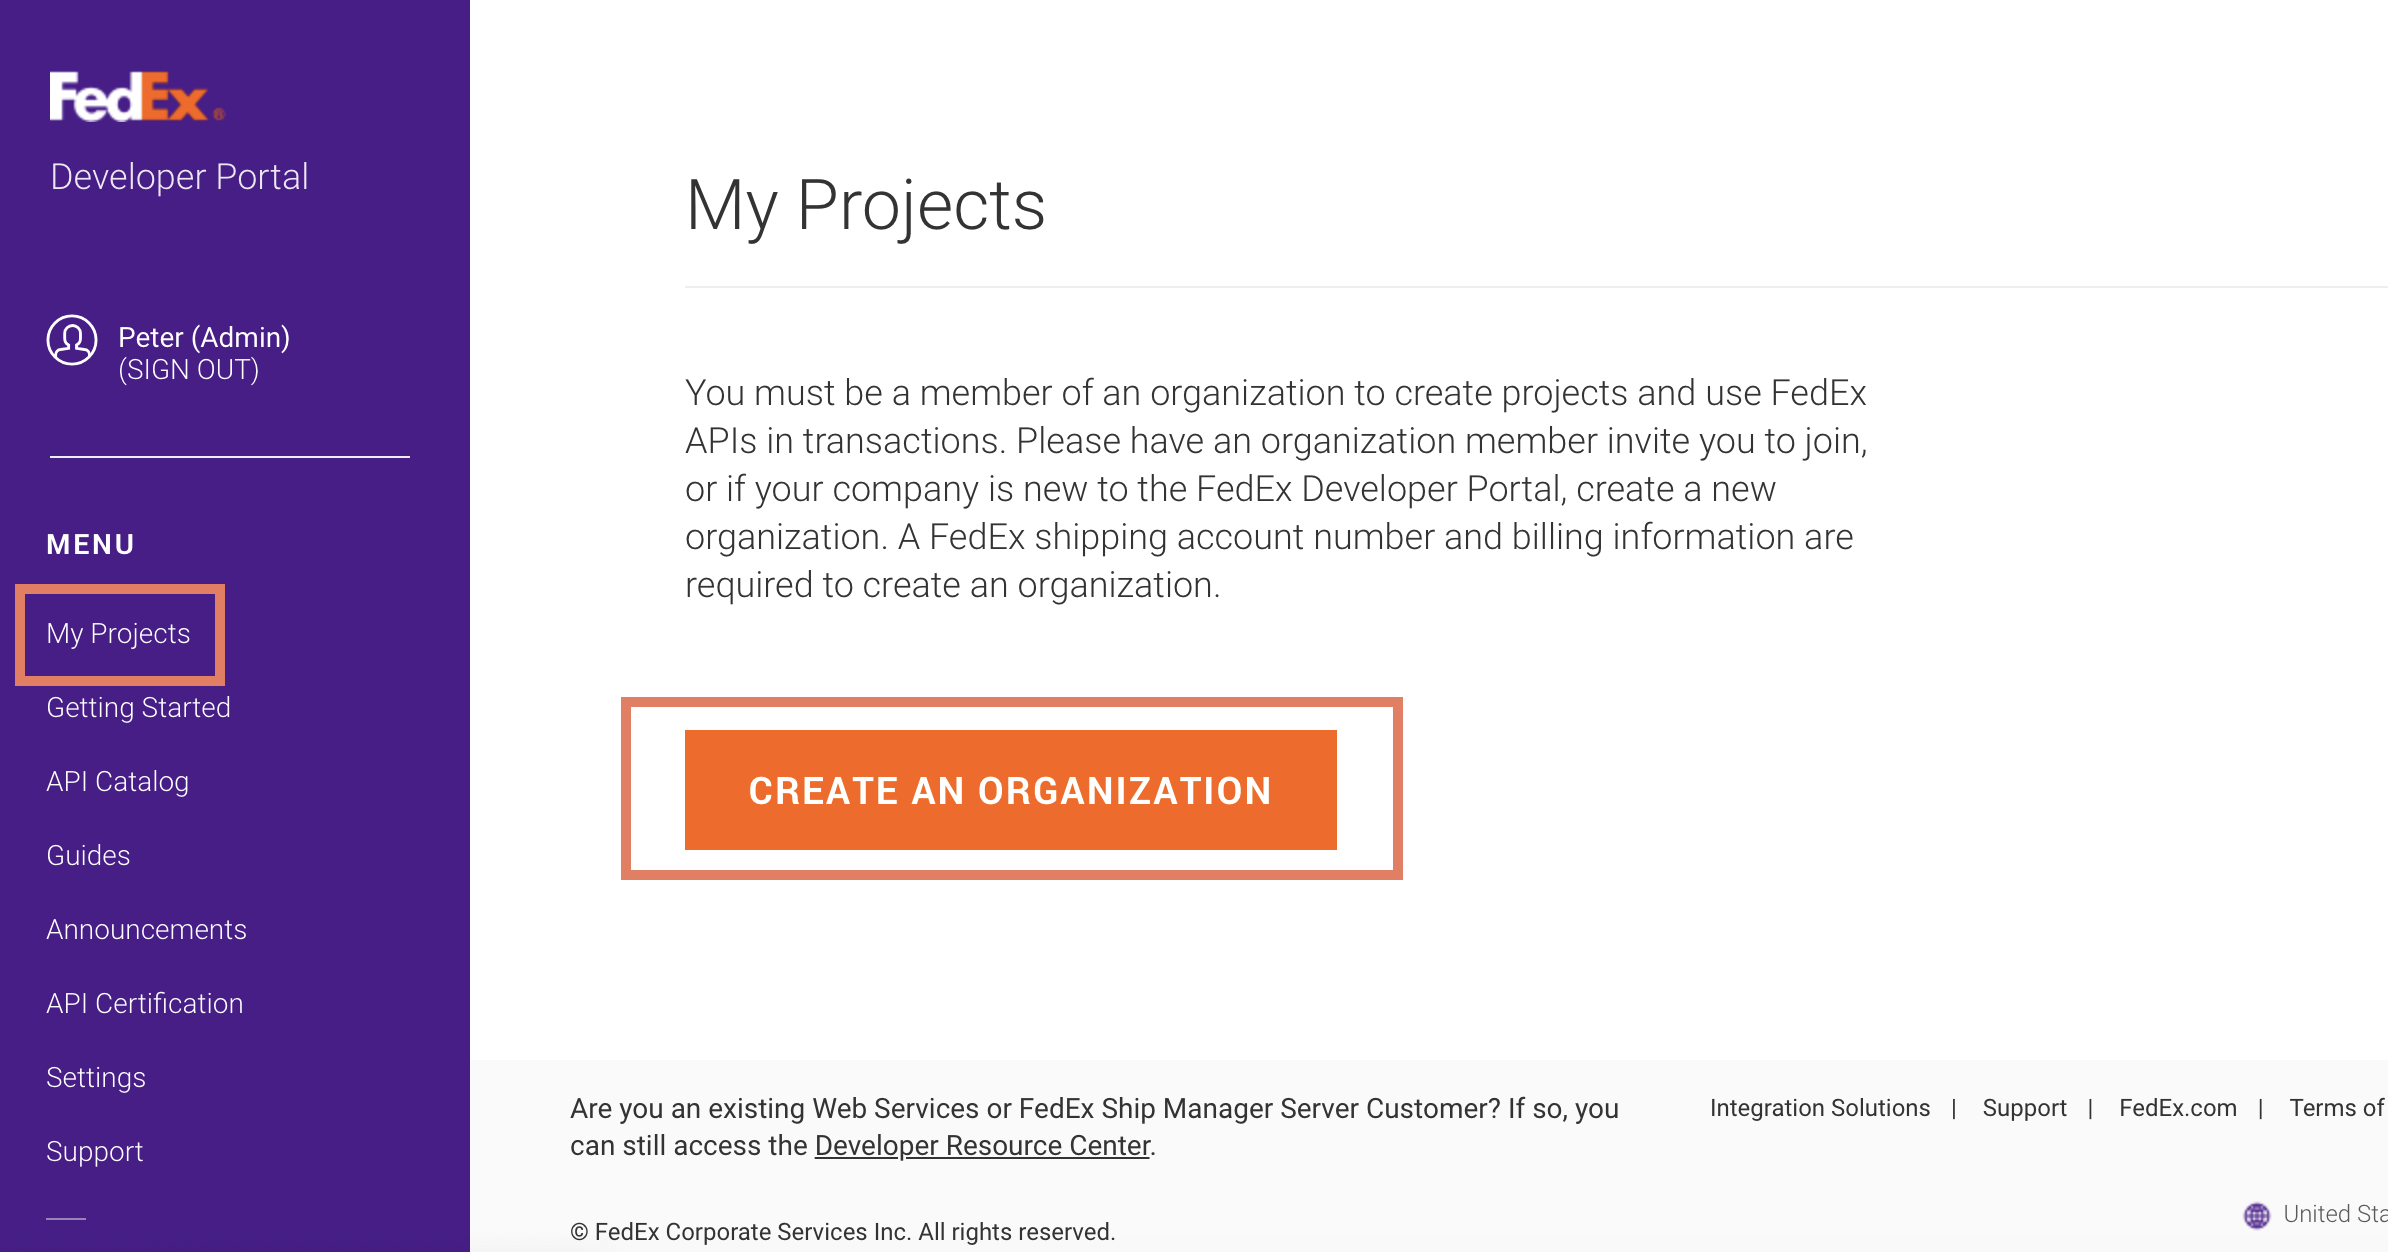
- Once logged in, click on the menu option My Projects. If this is your first time, you will need to create an organisation first. Click Create an Organisation. (If you already have an organisation, skip to Step 6).
- If you do not already have an Organization, create one and fill it out with your company details. In the dropdown where FedEx asks 'I work for a company that', select “Ships with FedEx and needs to integrate FedEx APIs into their system".
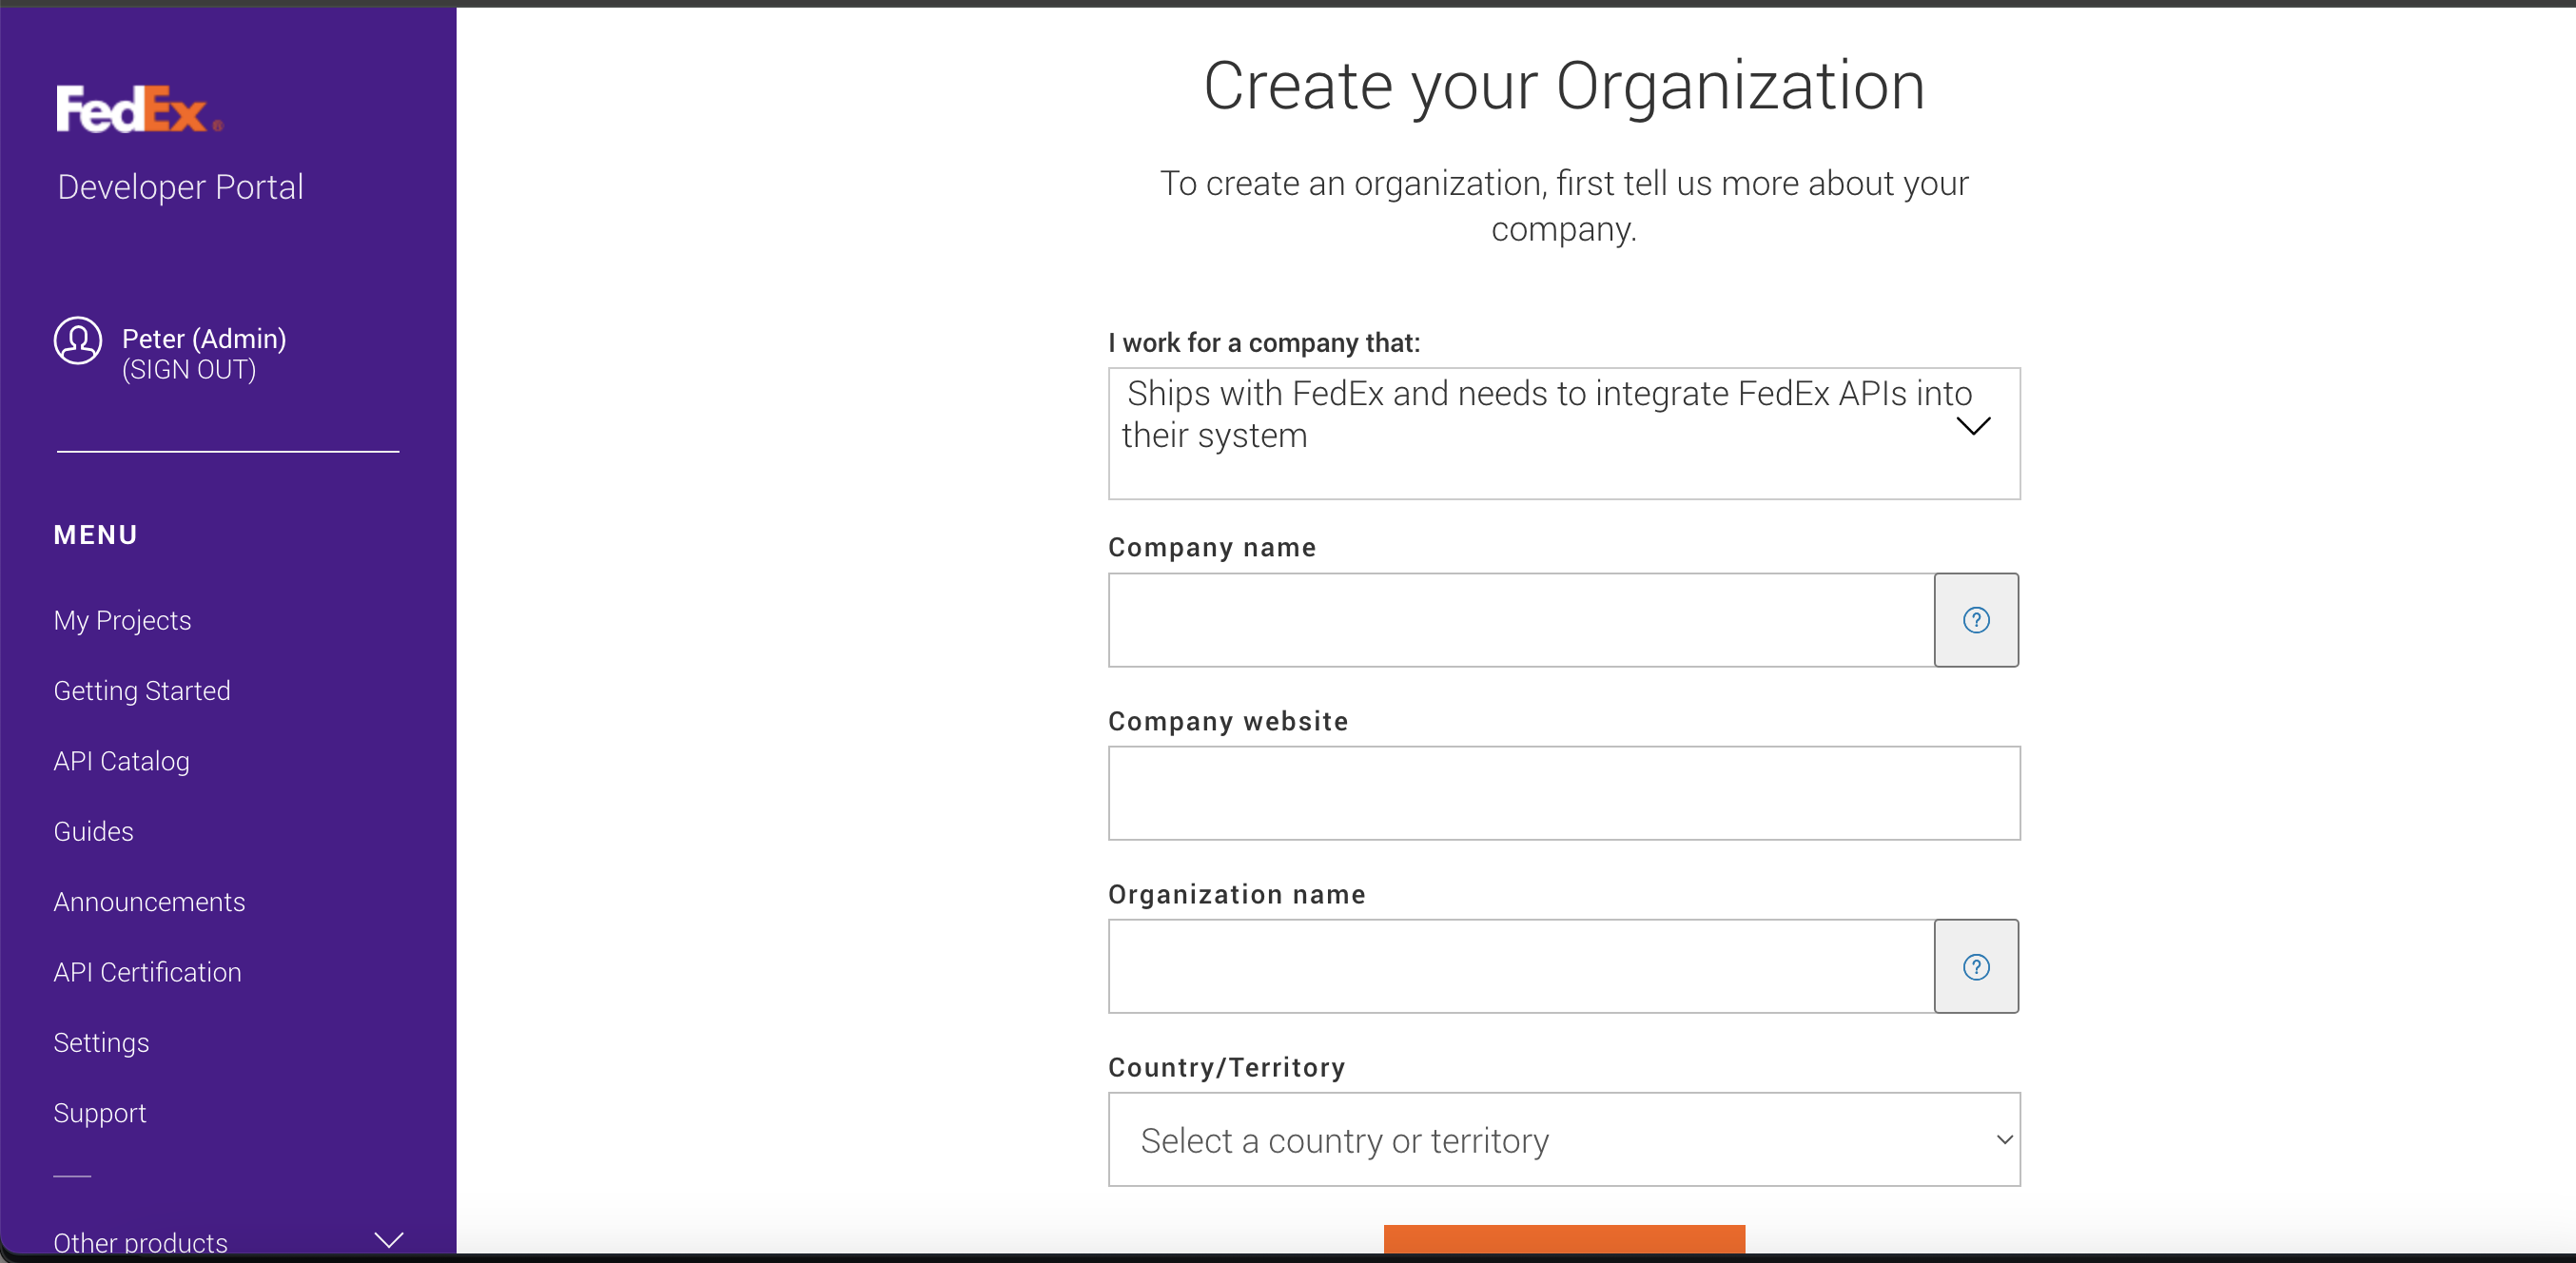
- Fill in the rest of your details for your business.
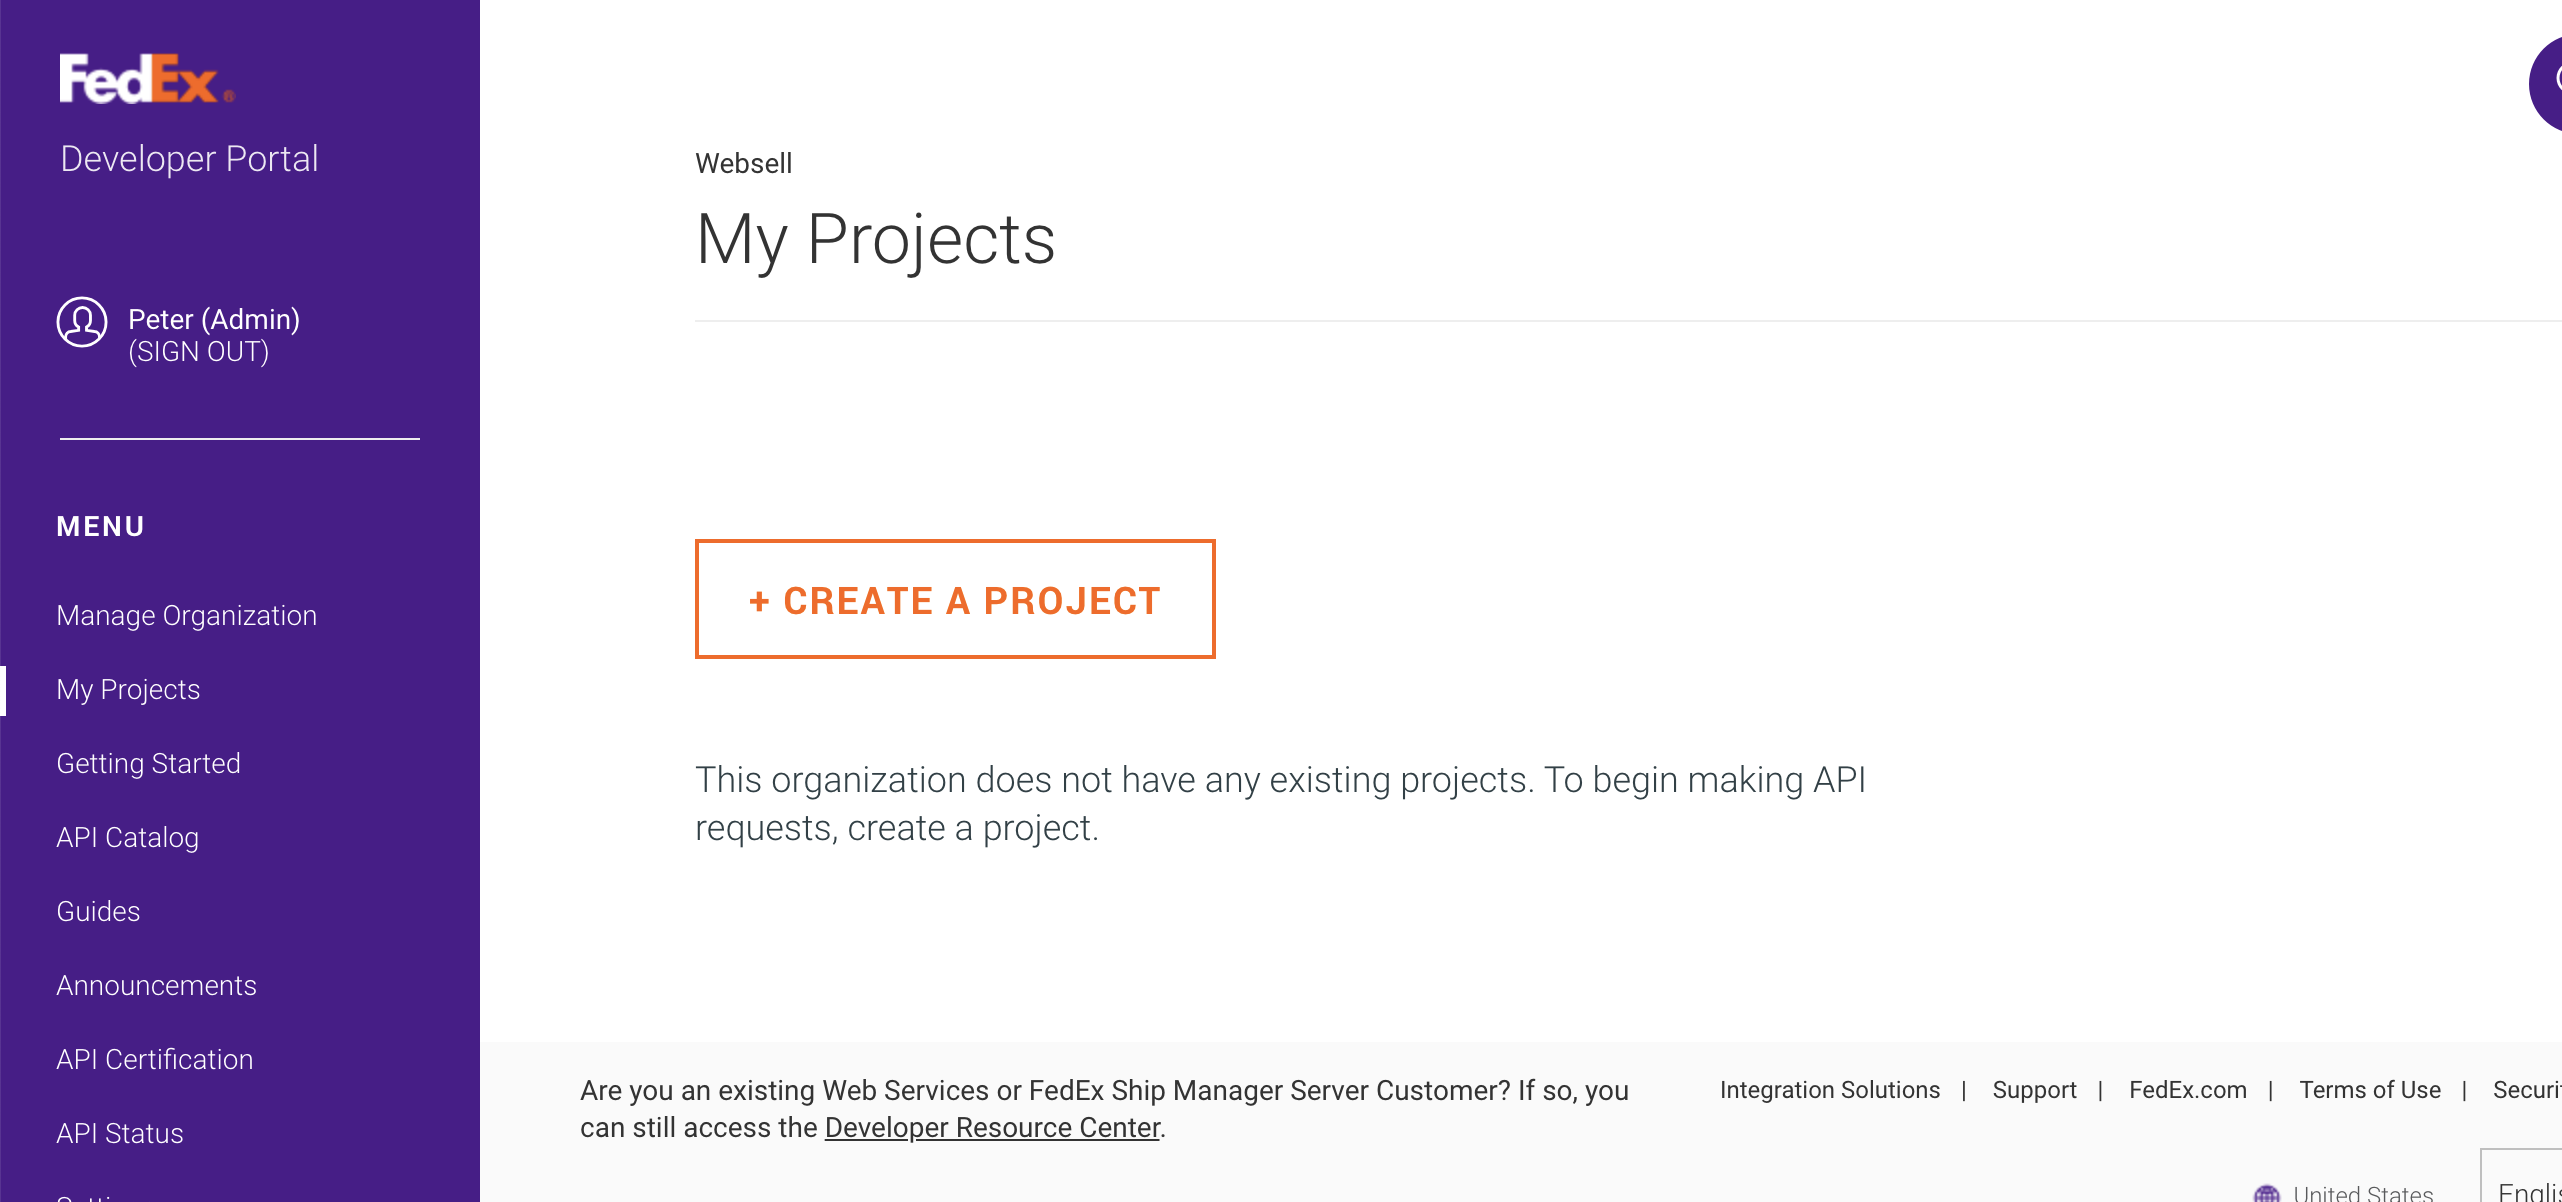
- Once you have created your organisation, or if you already have one, click on My Projects, and click Create a Project. If you already have a project, we still recommend creating a new one to ensure the correct setup.
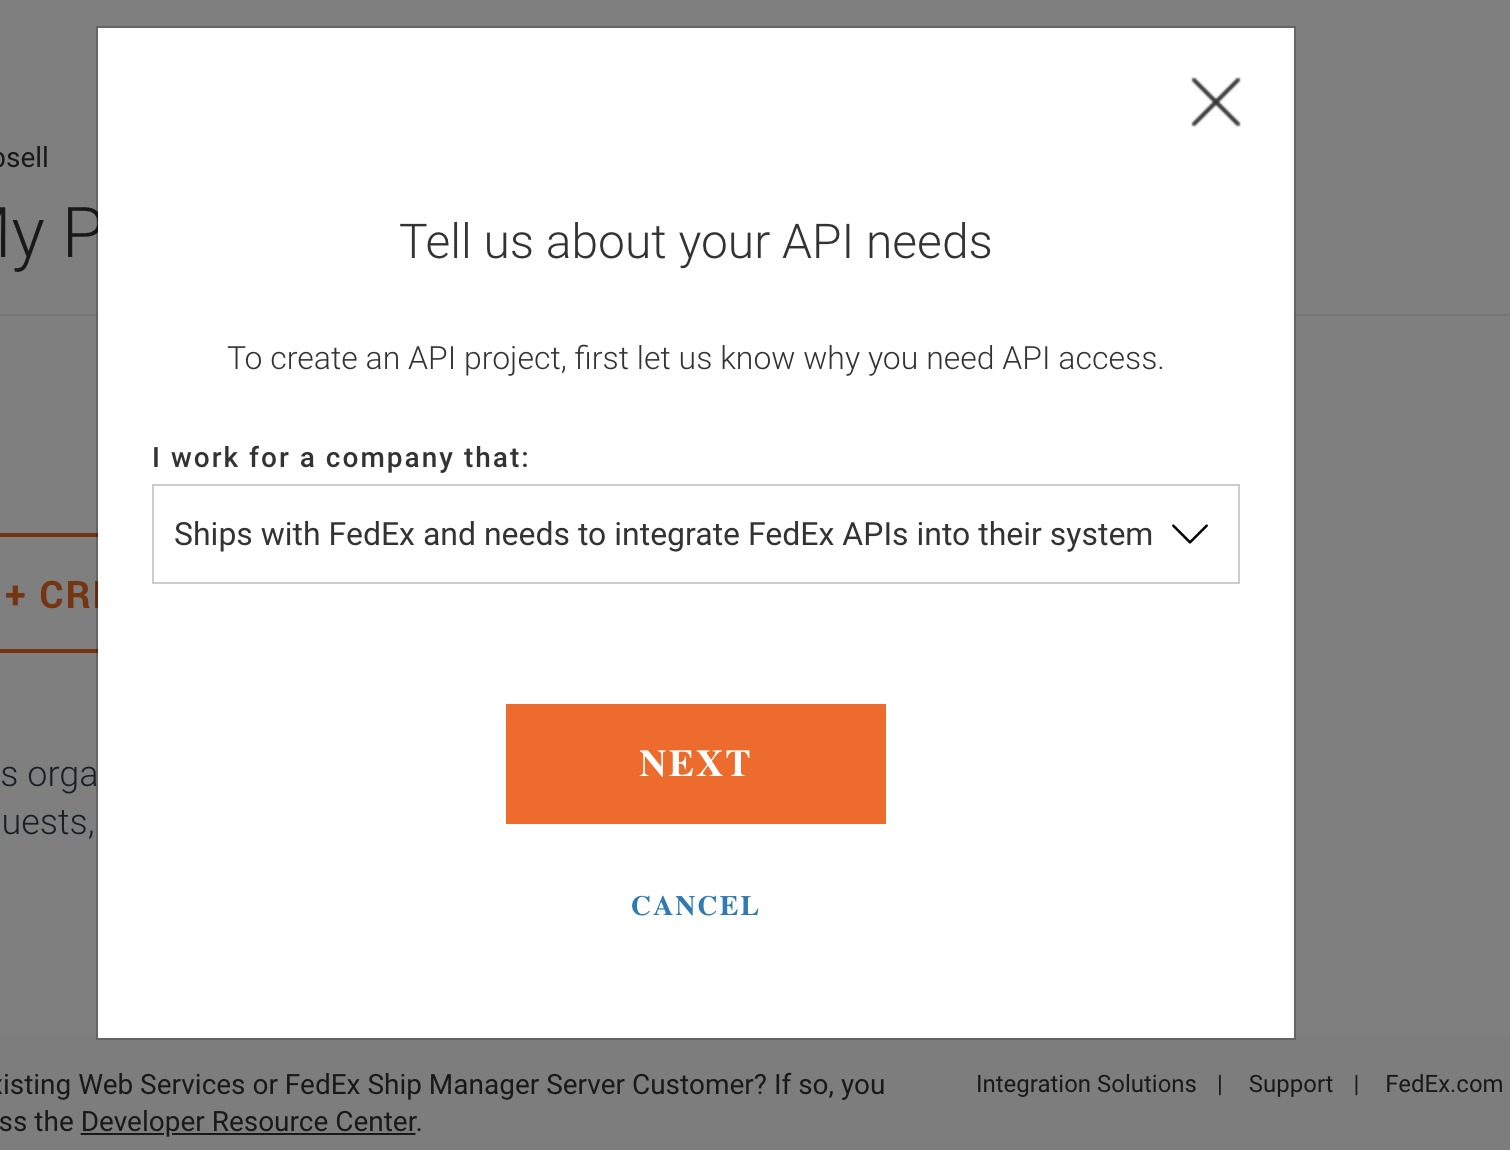
- In the dropdown where FedEx asks 'I work for a company that', again select “Ships with FedEx and needs to integrate FedEx APIs into their system"
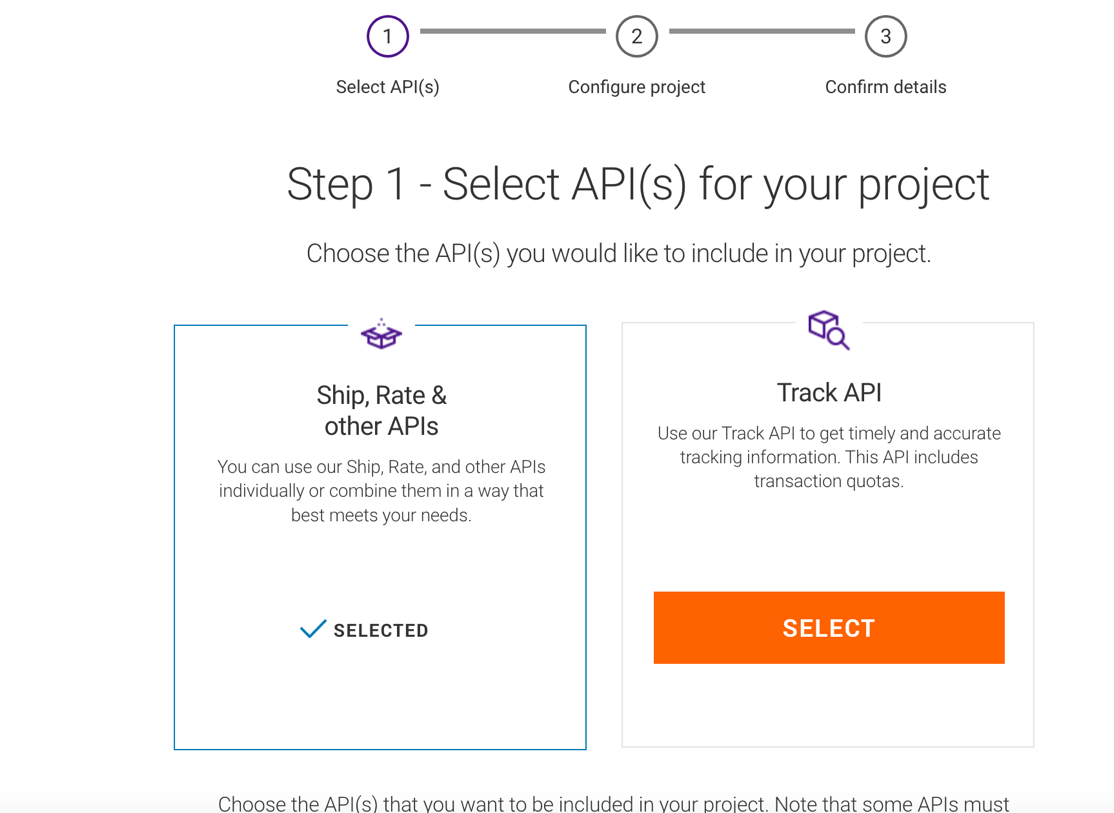
- When asked to select APIs for your project, Select Ship, Rate & other APIs
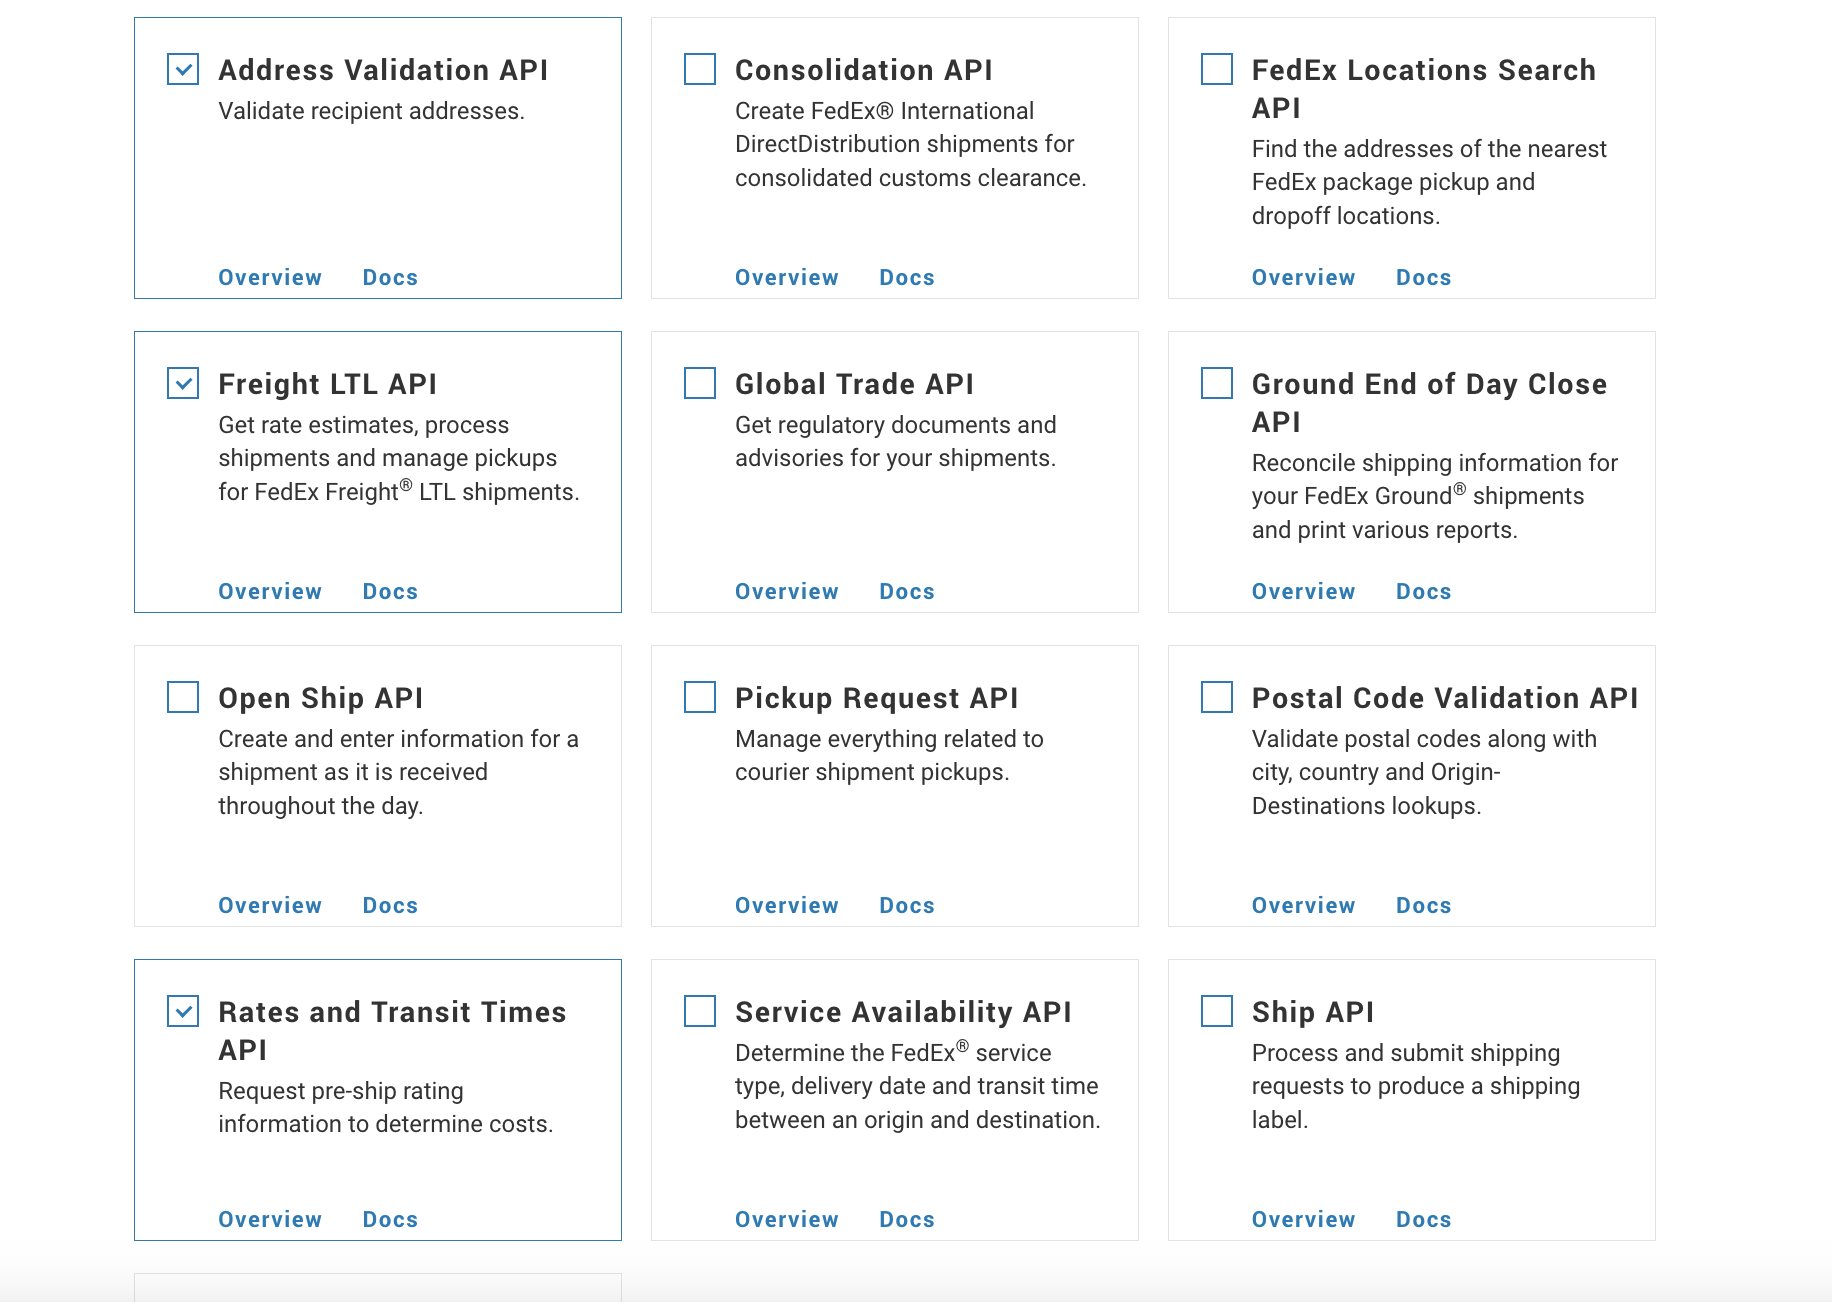
- Scroll down, and check the following API services. If you don't intend on using services like Freight, it's still recommended to check them to ensure that the integration fully works as intended.
- Address Validation API
- Freight LTL API
- Rates and Transit Times API
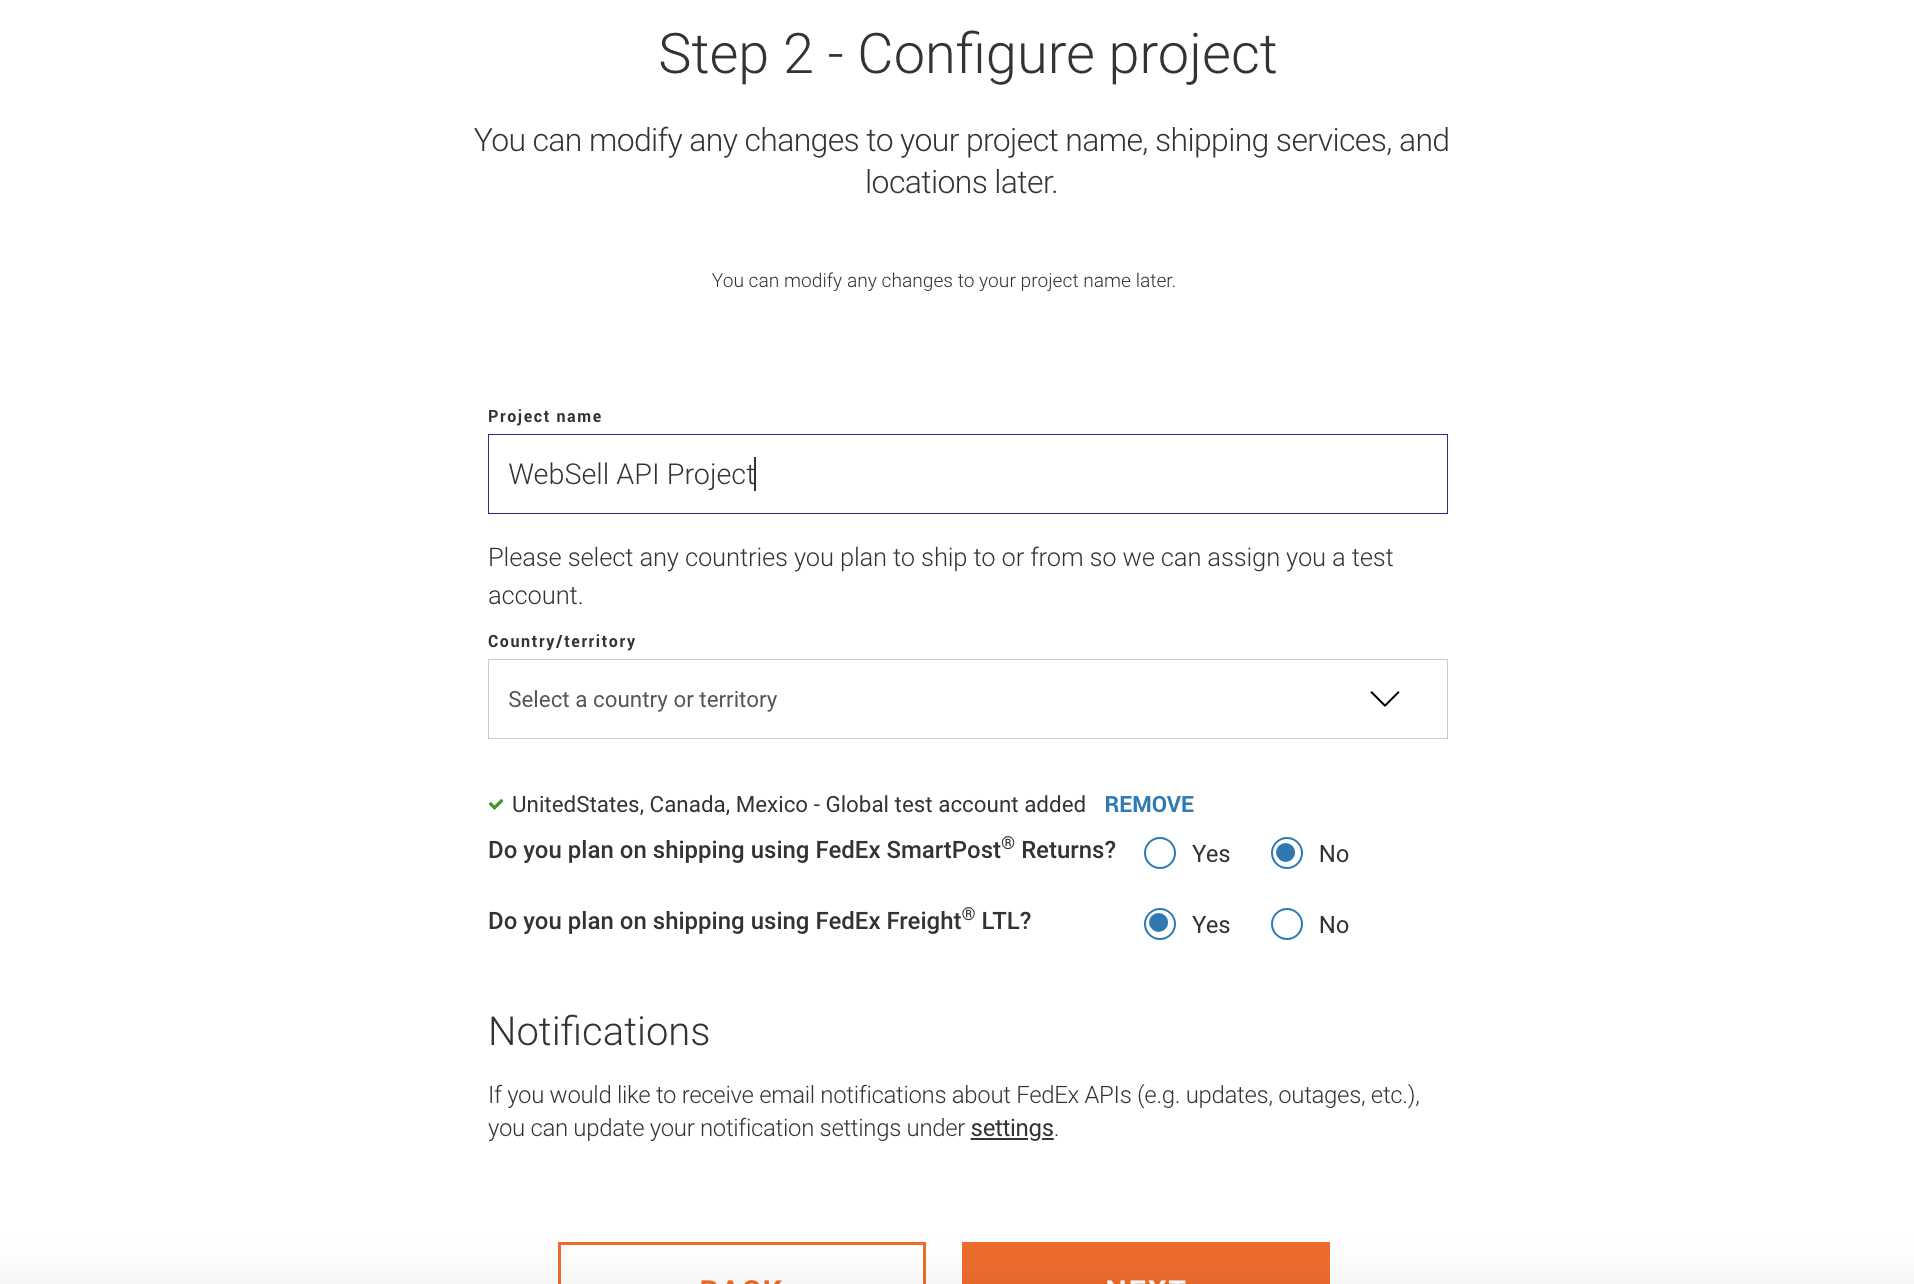
- Give your project a name, and add your shipping countries for test purposes. For the options on specific services, you can answer based on your business, or use the recommended settings as set below.
- Confirm your details and then finish creating the project.


After creating your new project, it should now be available under 'My Projects' in the menu. We will now be going through how to get API keys and a Shipping Account number to complete the setup.
Create a FedEx Shipping account
Under my Projects in the menu, click your newly created project. There will be 2 tabs, Test Key and Production Key. We will be using Production Keys only in this guide. If you wish to continue with Sandbox tests, record the API key, Secret Key, and Account number, and go to Set up FedEX on your Web Store Manager.

Add a nickname to your Shipping Account.
Click on your profile in the top right, and click My Profile. In the profile menu, click Account Management or click here https://www.fedex.com/apps/myprofile/accountmanagement/
Select your Shipping Account created account, and click View/Edit.

Under Nickname and Security Options, click Edit and enter a nickname for the account. There is no restrictions on the nickname, but you will need to use it alongside the account number later. Click Save, record the nickname and account number, and now we can add the Shipping Account to your project.

Adding your Shipping Account to your API project.
Before adding the Shipping Account to your project, we must add it to your organisation.
- Go back to the FedEx Developer Portal https://developer.fedex.com/api/en-us/home.html
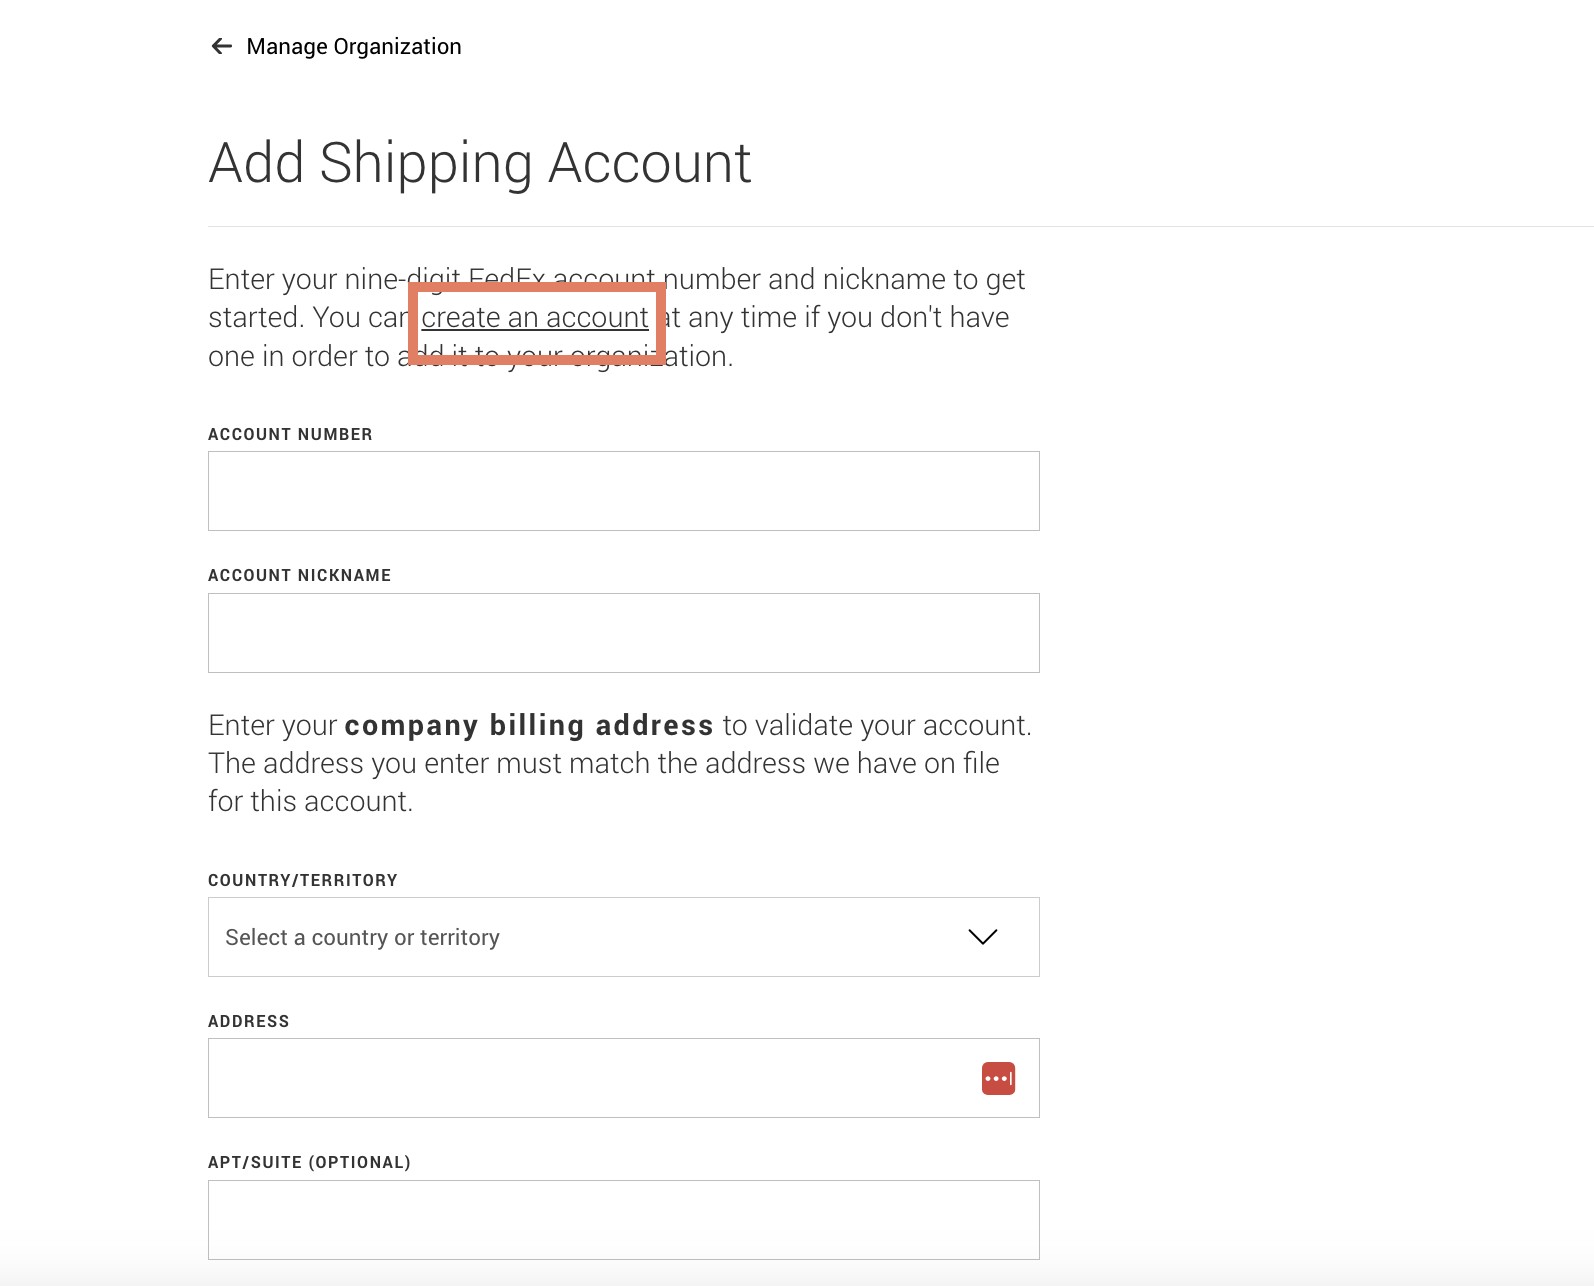
- Select Manage Organisation, and click Shipping Accounts. Click Add Account. (https://developer.fedex.com/api/en-us/organization/add-account.html#/addaccount)
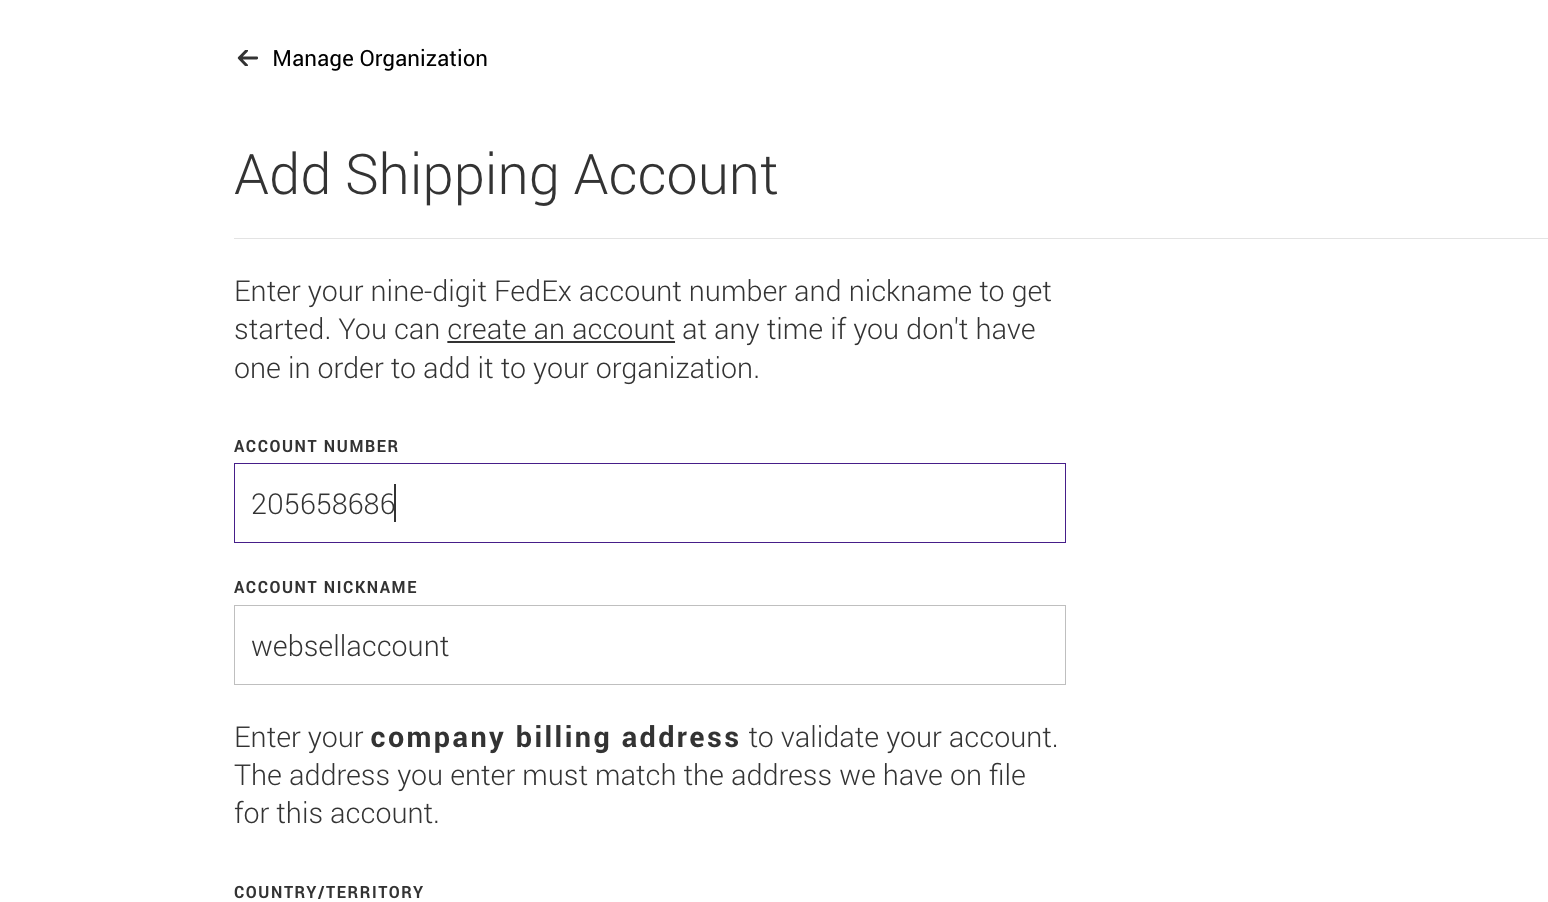
- Enter your account number and nickname, and the billing address of your company.
 After entering all your details, and accepting the license agreement, you will have successfully added your Shipping account. Let's return to the Project Page and add the shipping account.
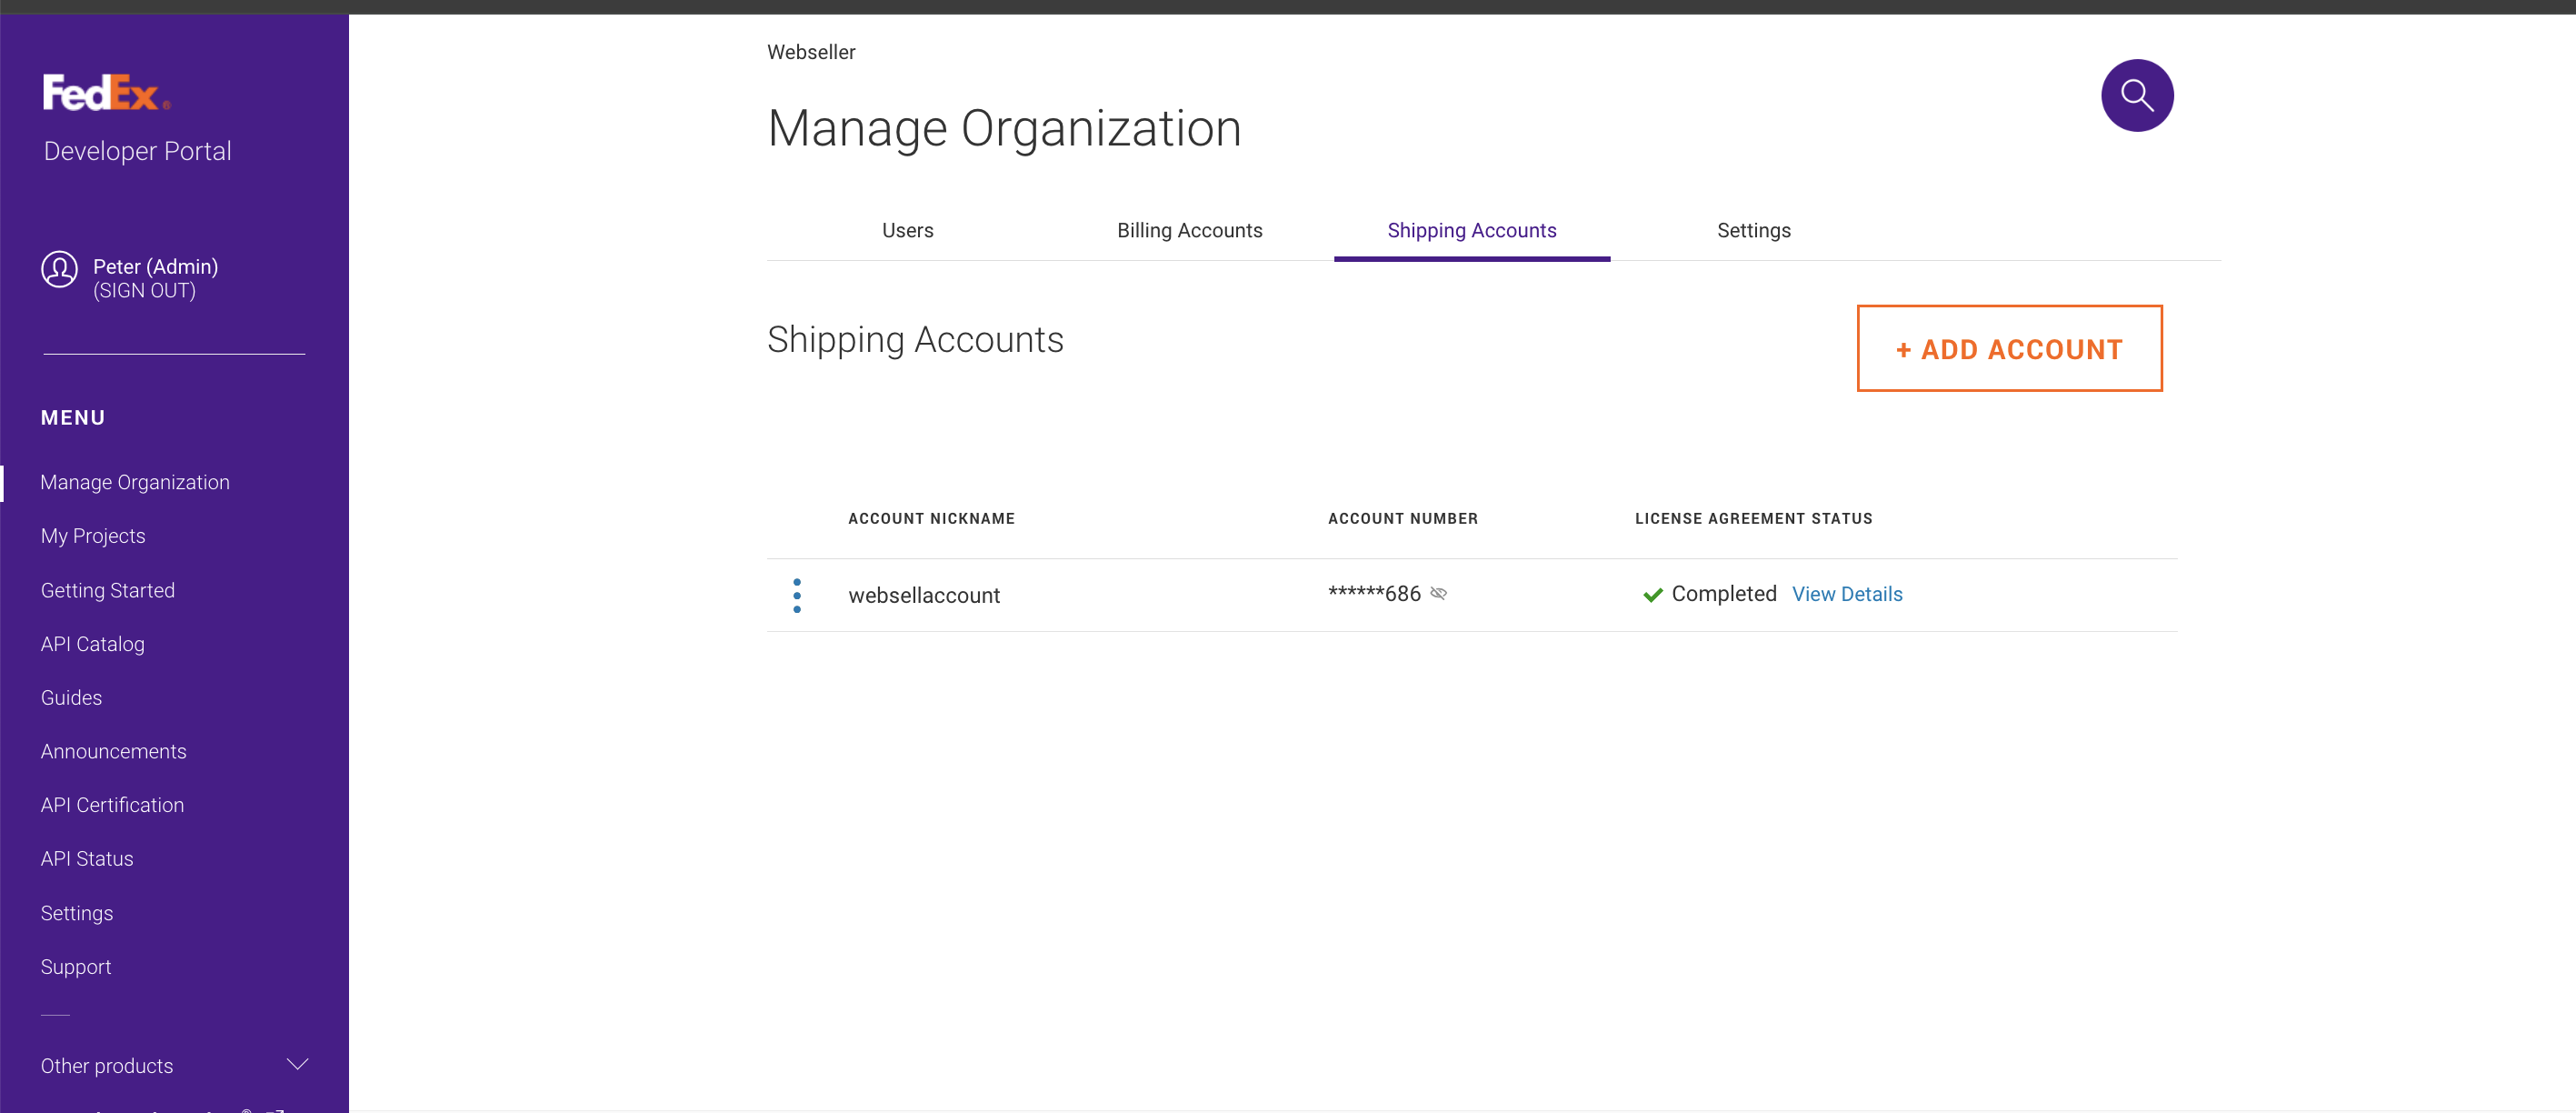
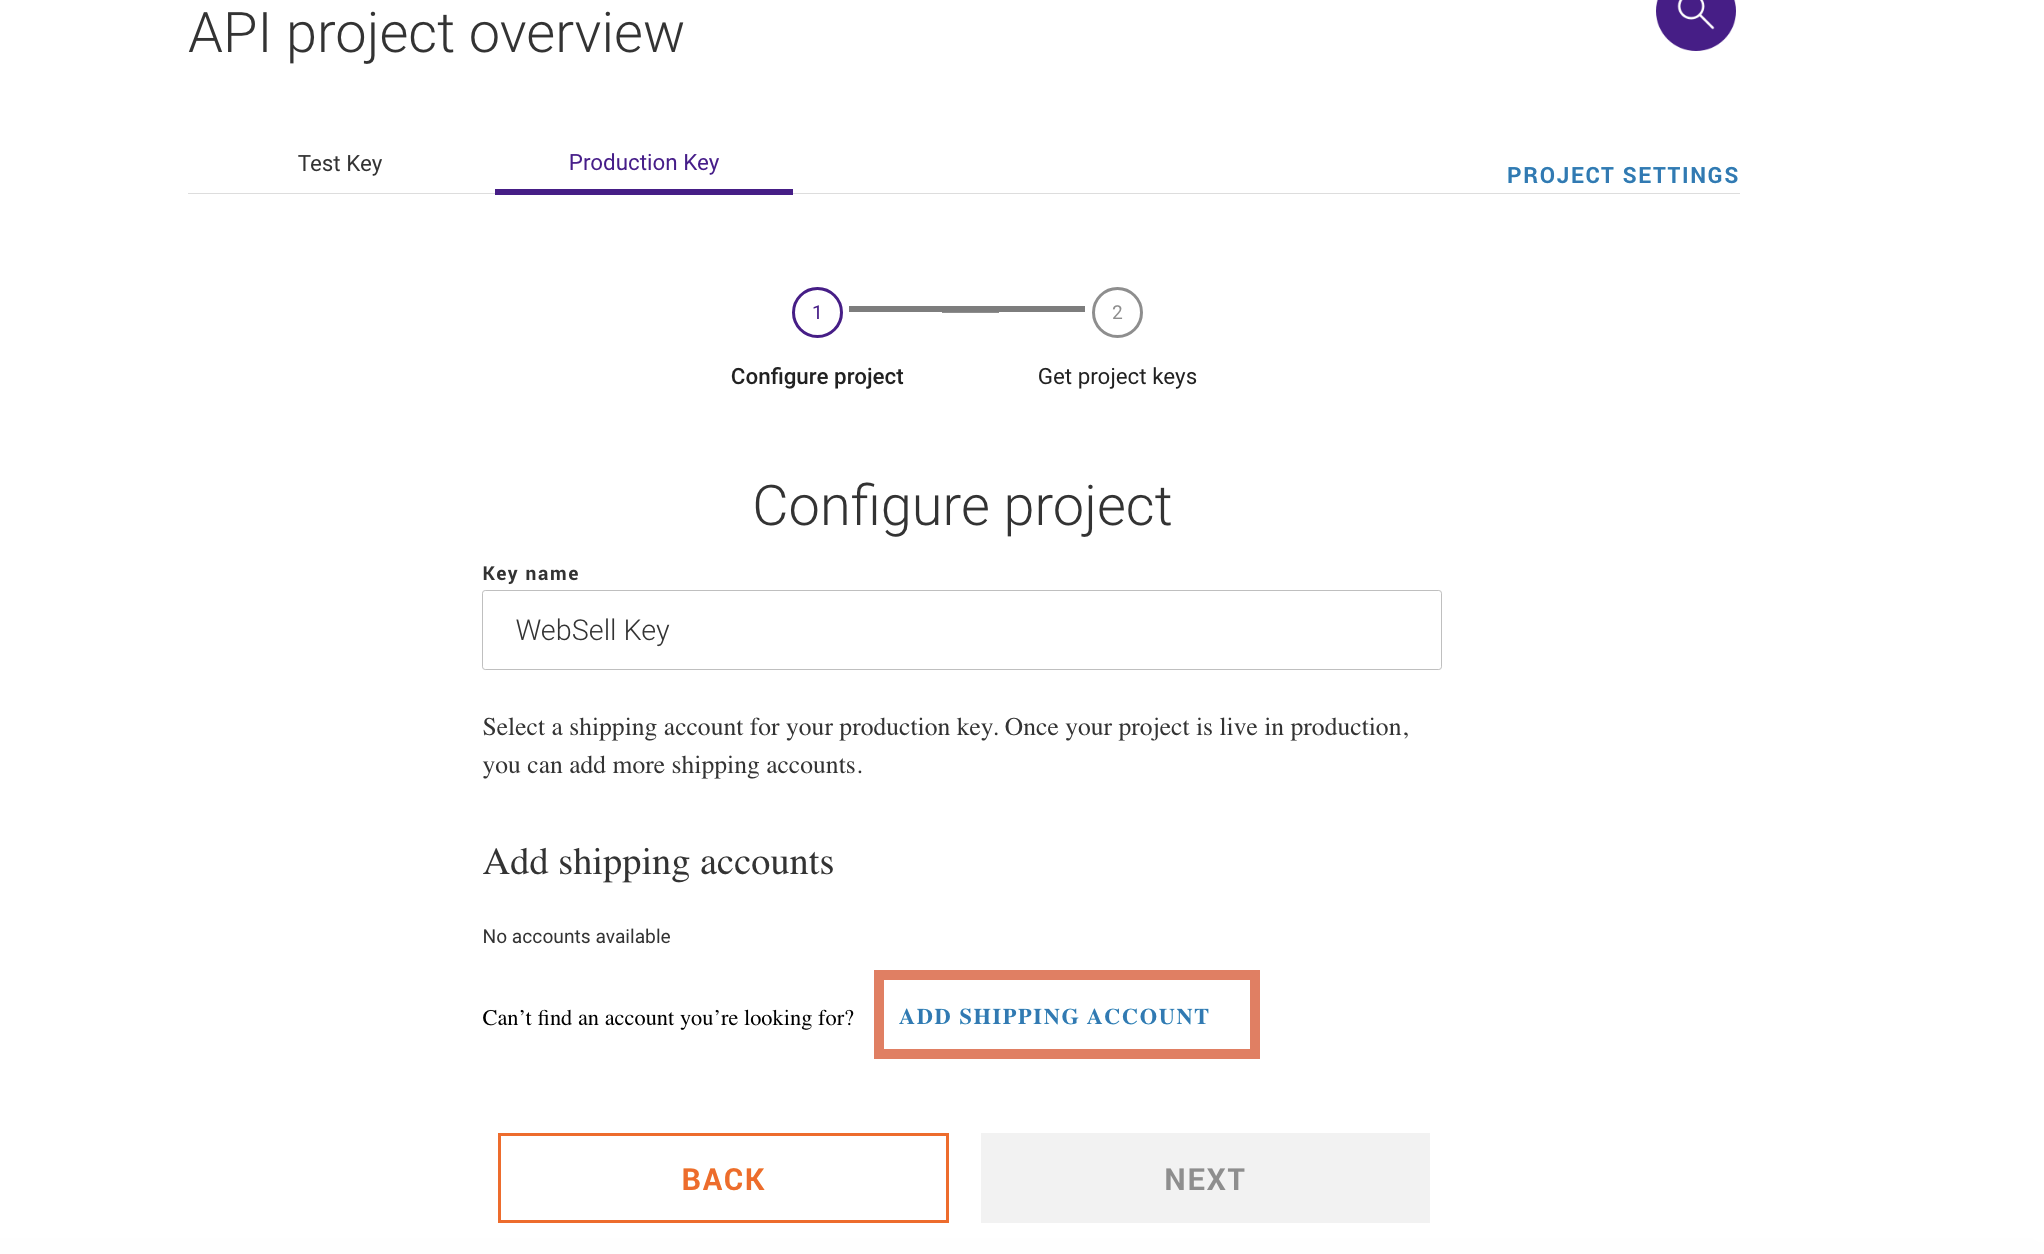
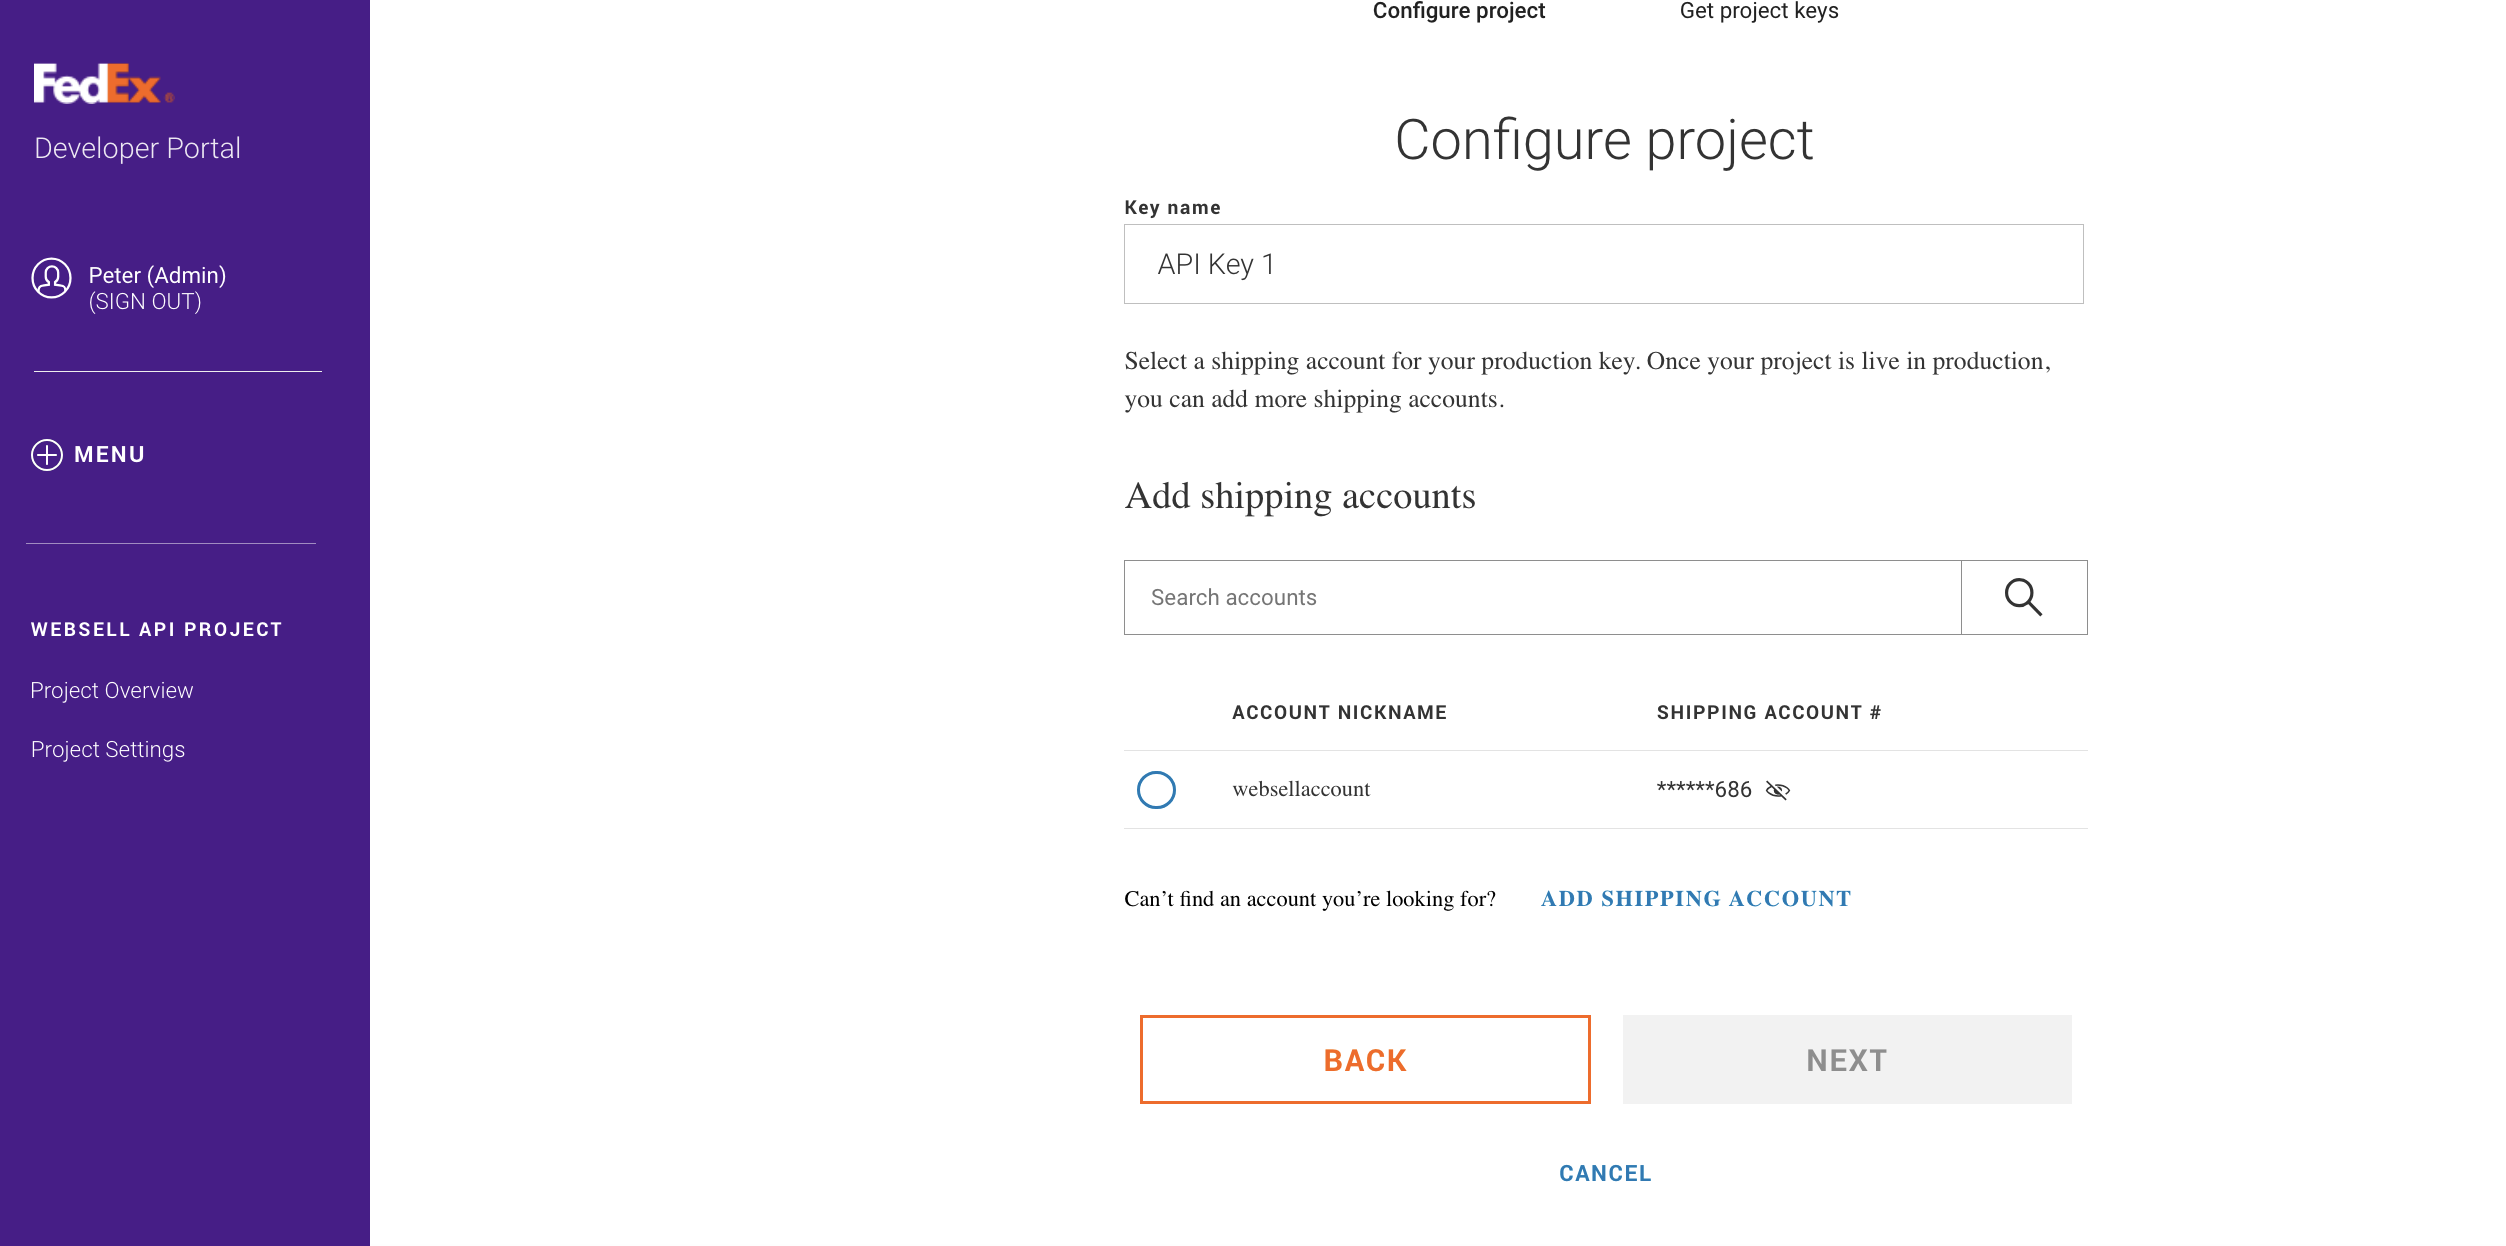
- Click on My Projects and select your API project. Click on the Production Keys tab and add a Key Name. Select your Shipping Account, and click Next.
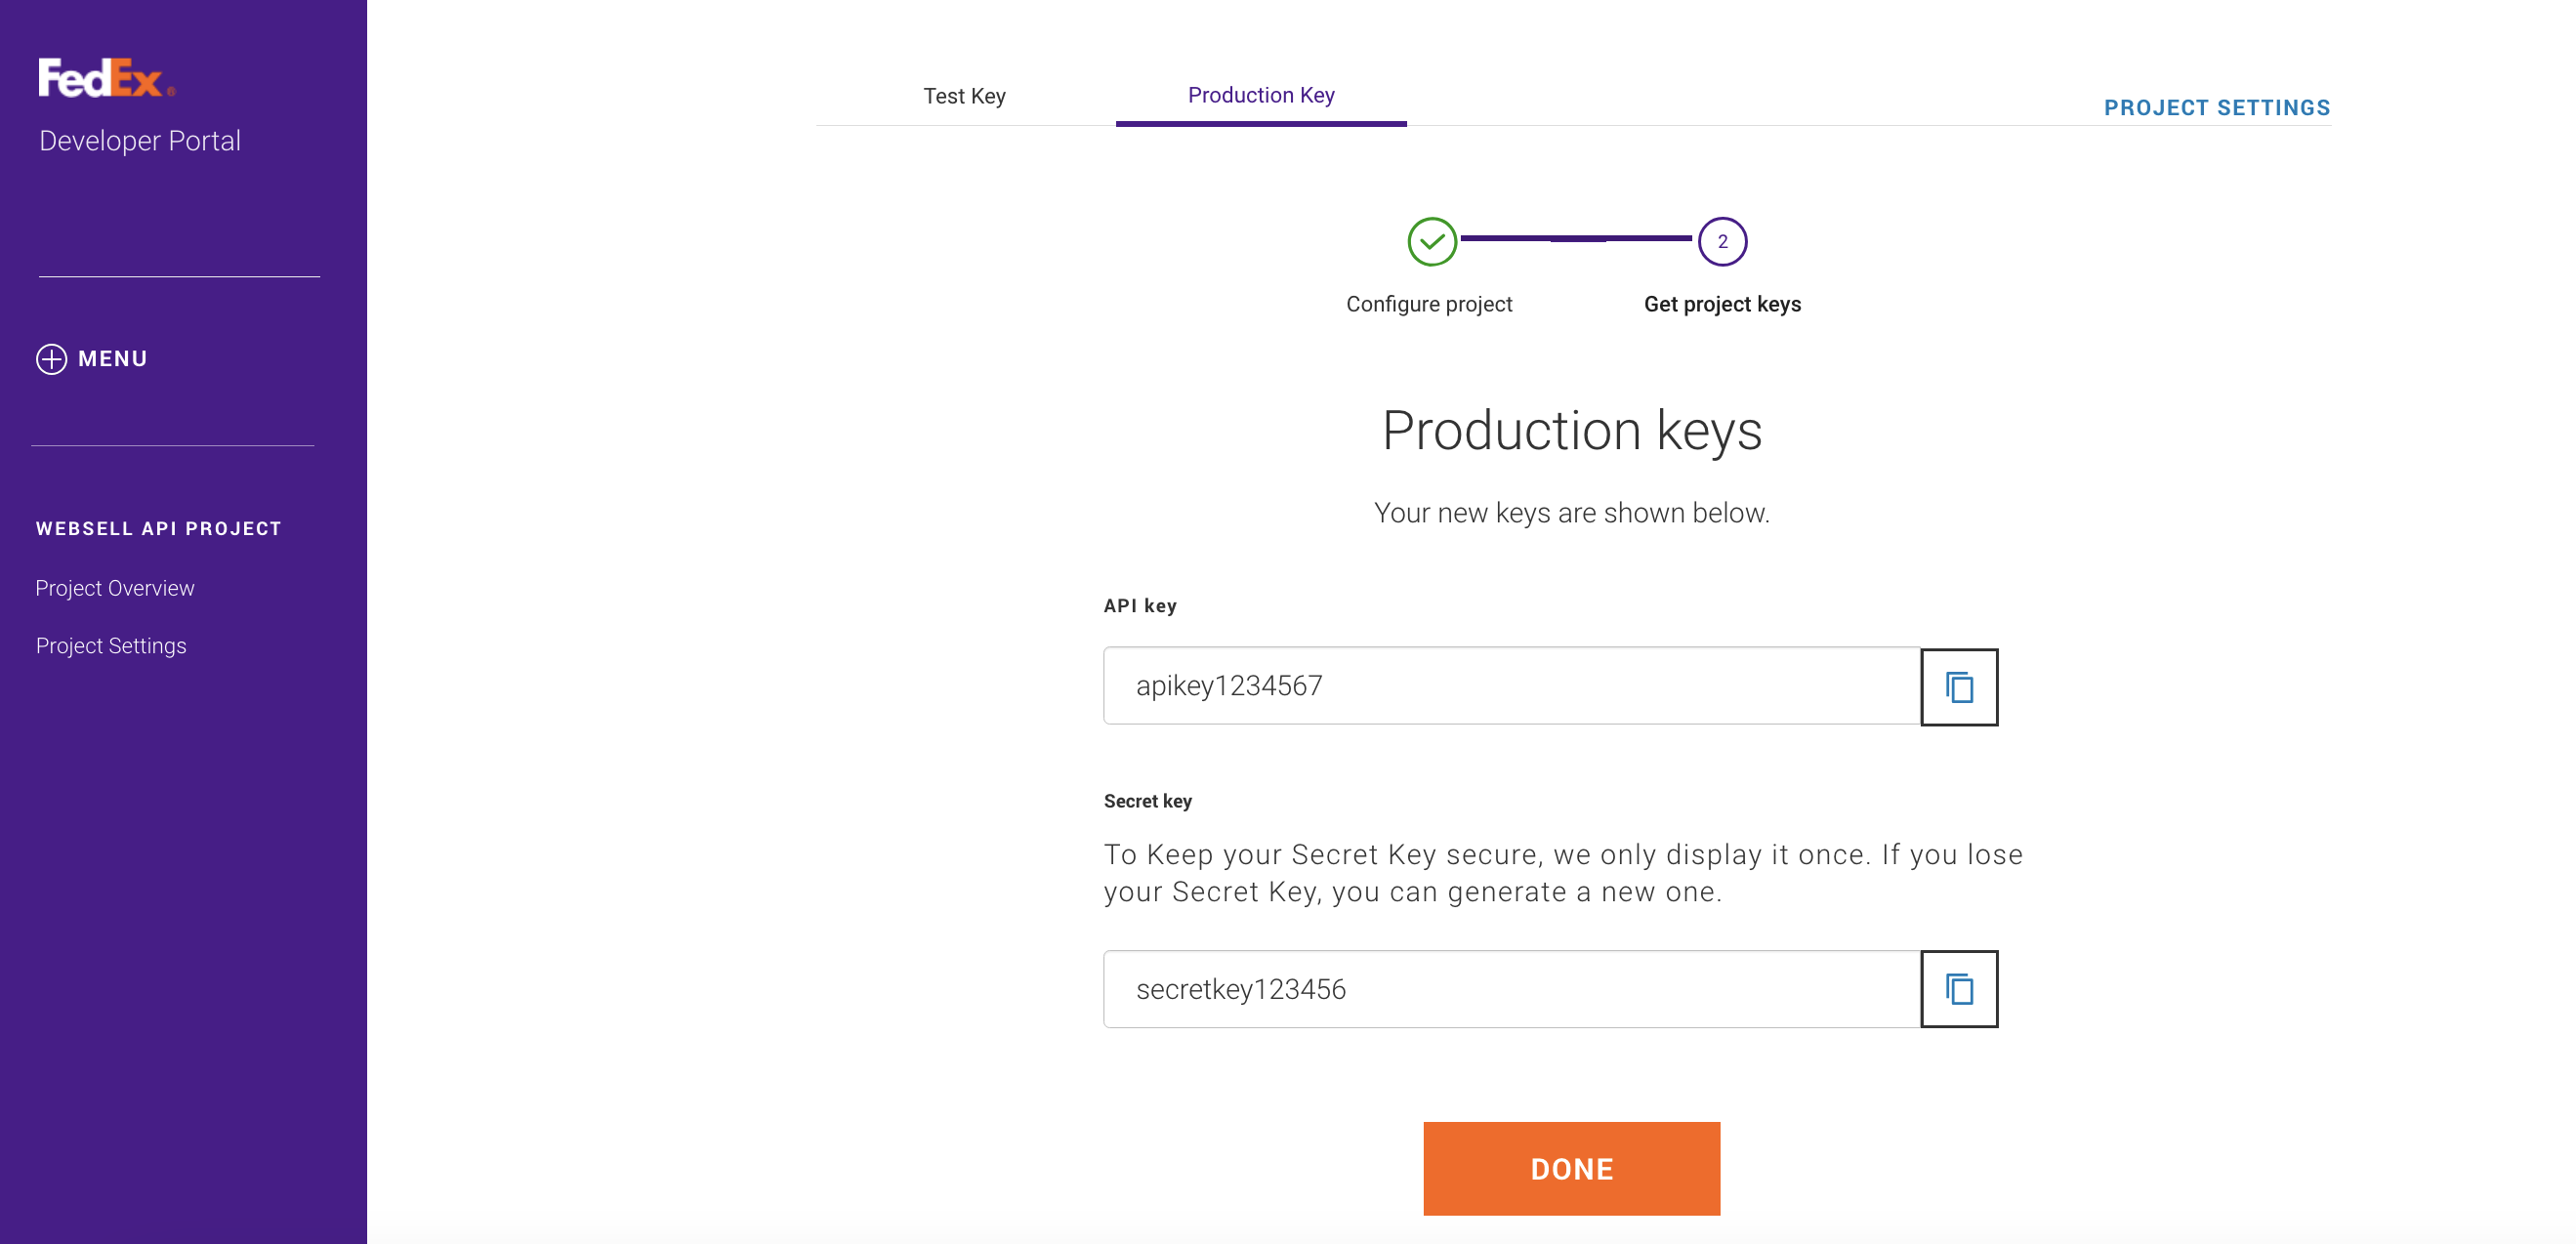
- Your API Key and Secret Key will be generated and displayed for you. Record them down, as you are now ready for your final step to setup FedEx on your webstore.
 After entering all your details, and accepting the license agreement, you will have successfully added your Shipping account. Let's return to the Project Page and add the shipping account.


Set up FedEx on your Web Store Manager.
- On your Web Store Manager, go to Fulfillment & Taxes -> FedEx setup.
- Enter your Shipping Account number, API Key, and Secret Key.
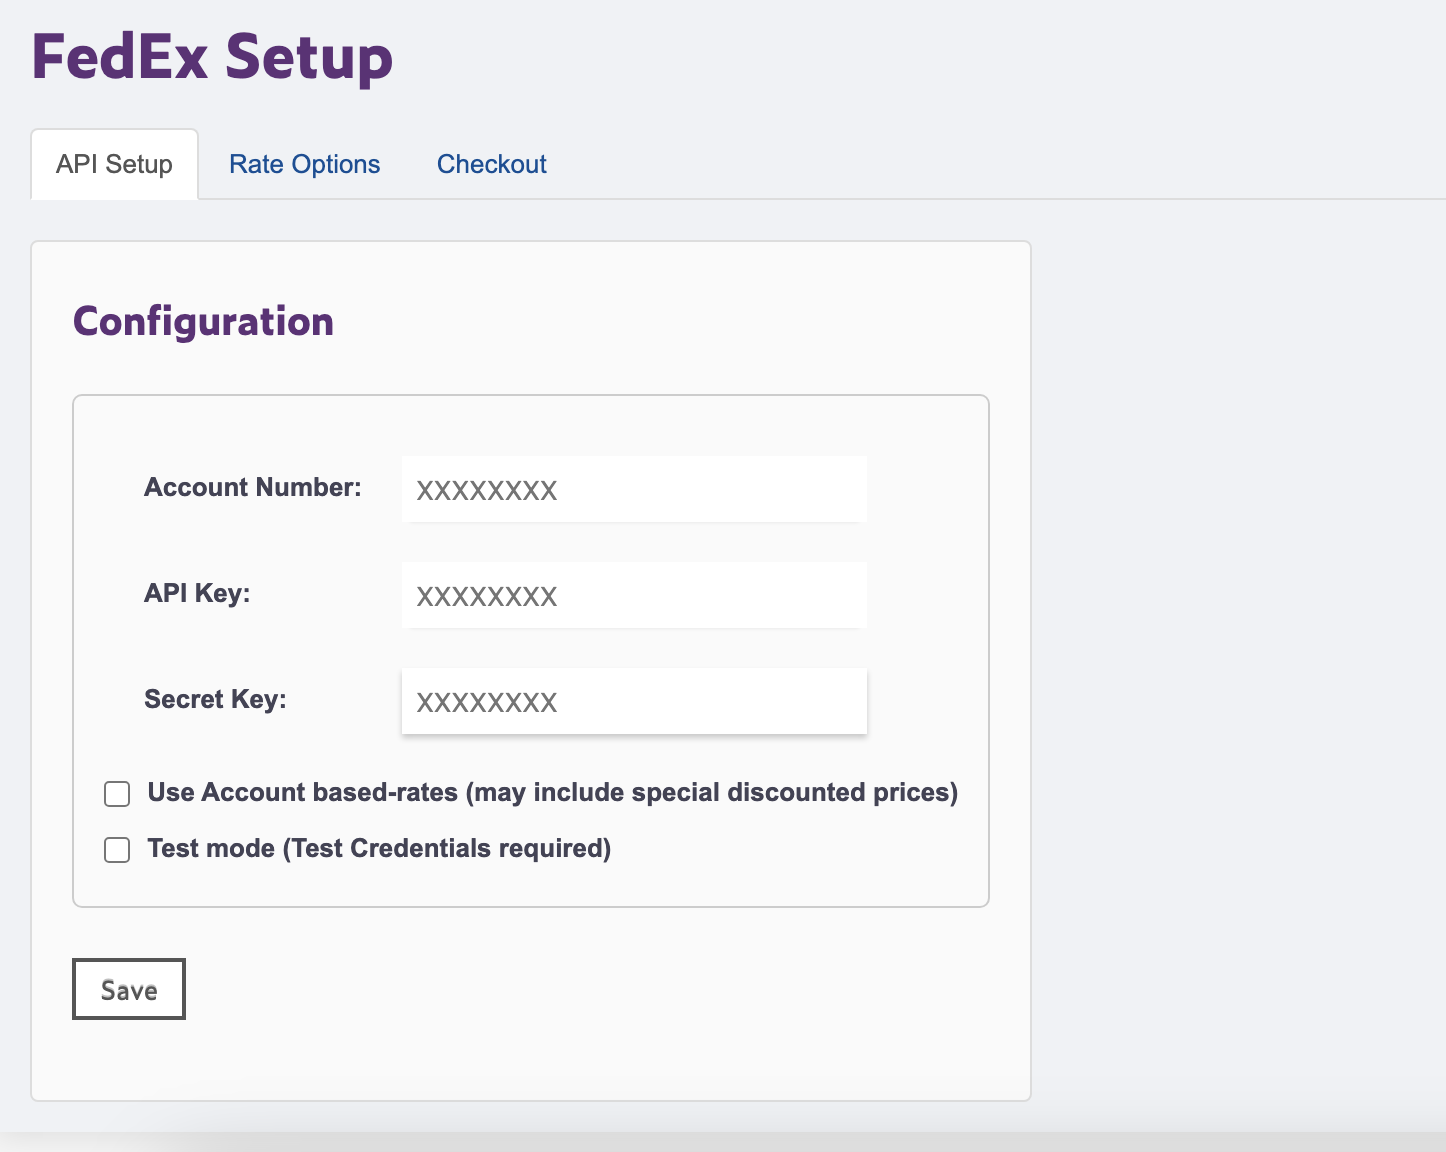 Please take note of the option Use Account based-rates (may include special discounted prices). When testing, the rates shown might be much higher than expected, or more than our previous integration. We recommend testing the rates with and without this option checked to see which rates you would like to display, as FedEx may be offering you large discounts on shipments based on your account.
- (Optional, but recommended) Review the Rate options to ensure they match your setup. Particularly, verify the Shipping Address, which verifies to your Store Address, matches the address entered to your Shipping Account. Some services will use the address set in your Shipping Account, while some will use this address. It is best practice to use the same address for both.
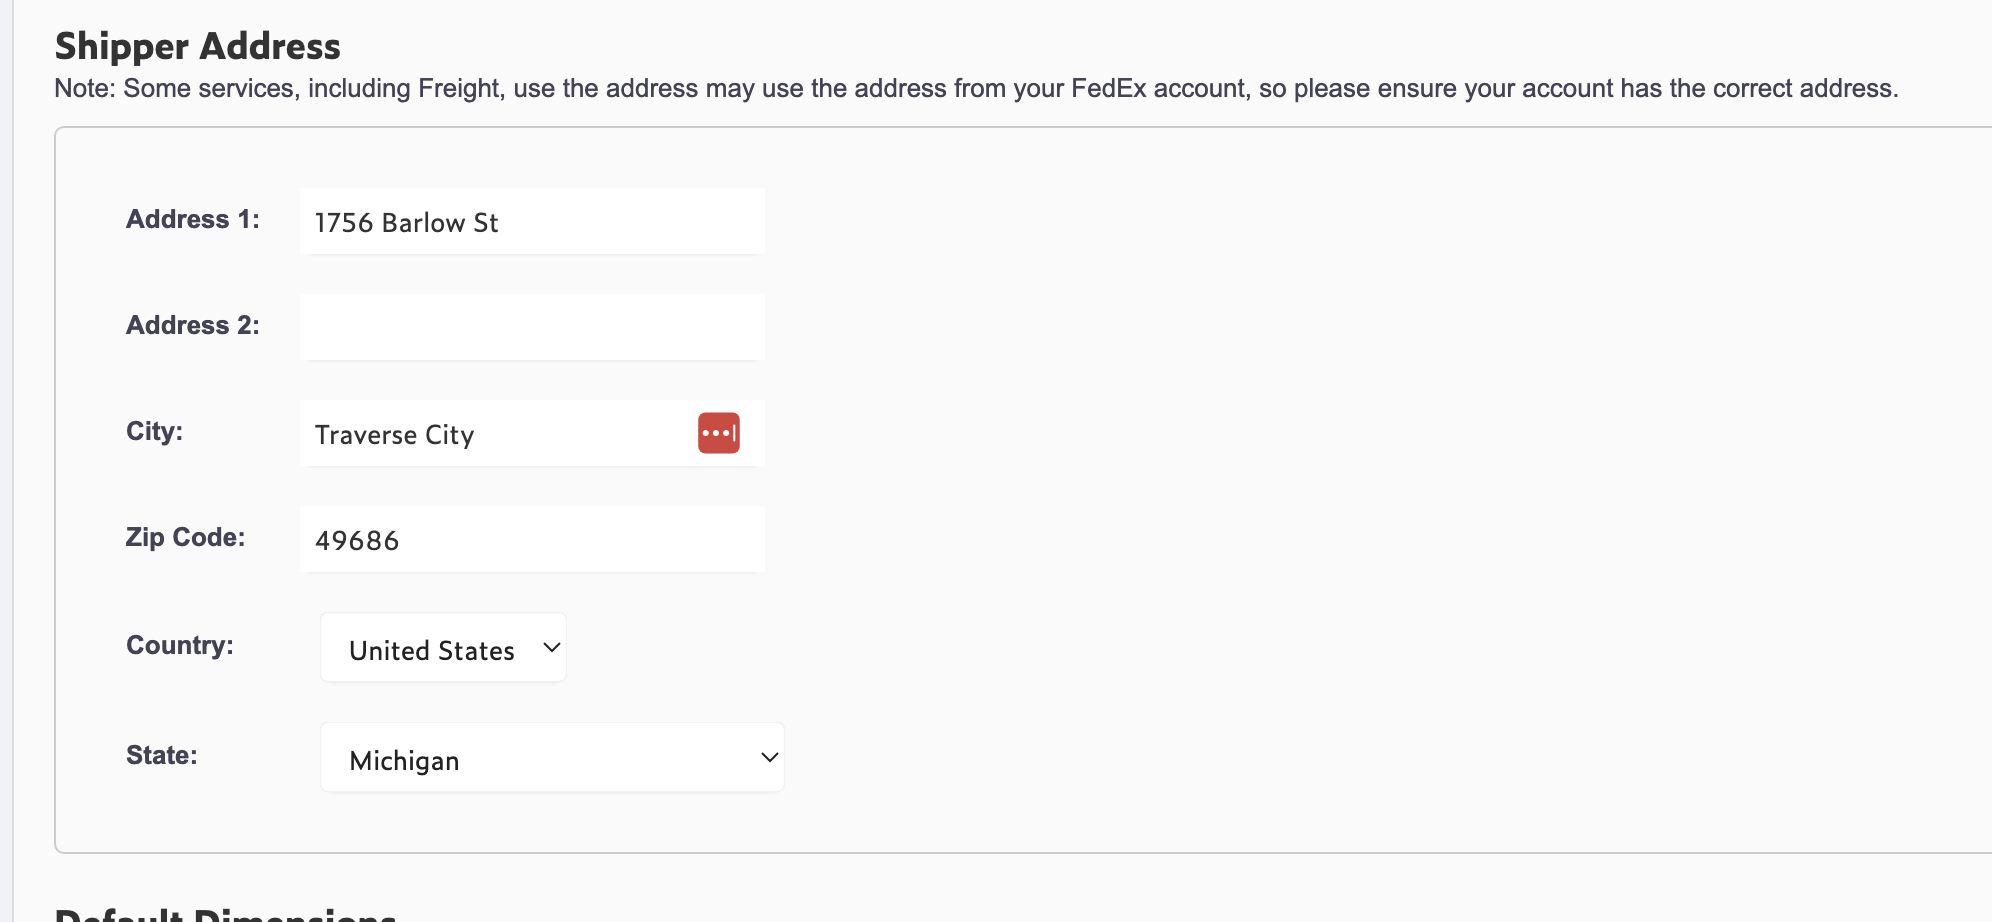
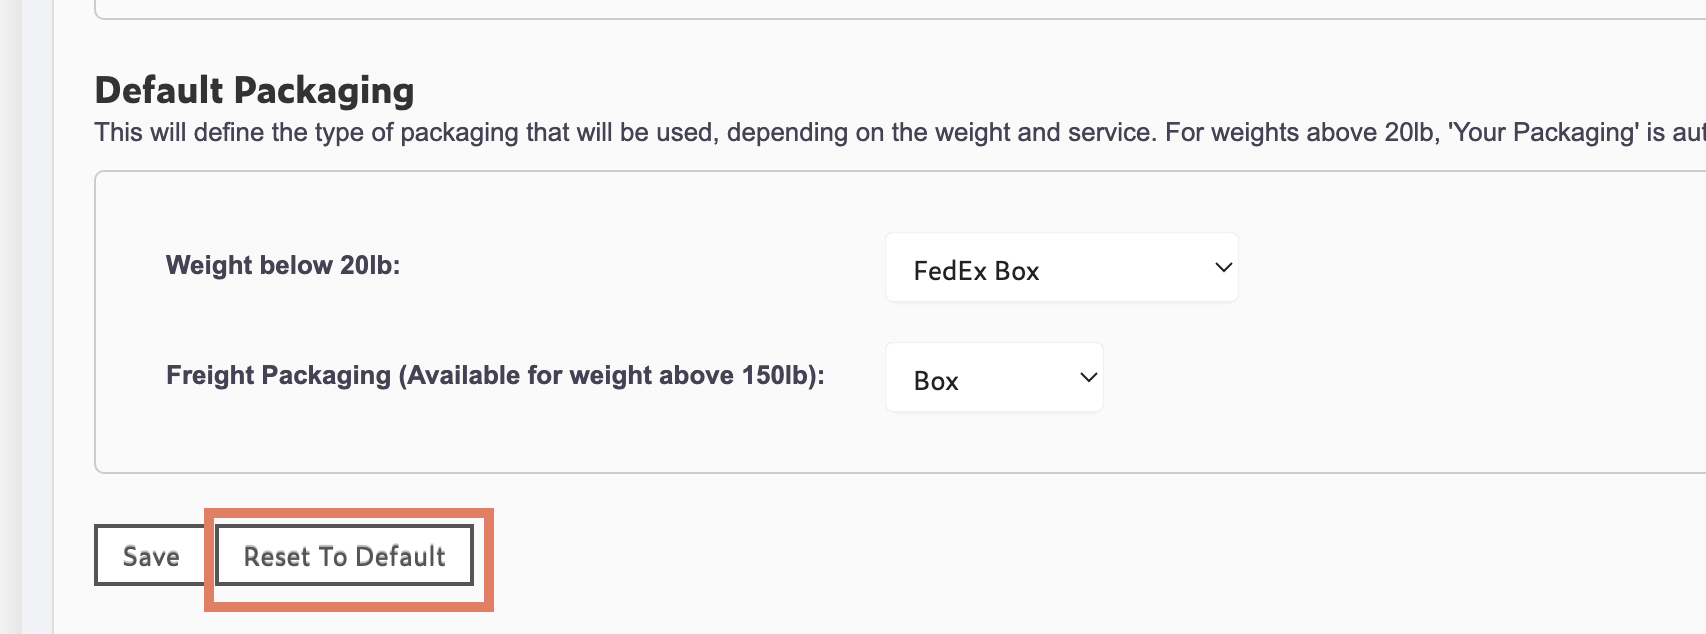
- Check the other rate options, such as default package dimensions and packaging, although the rates should have enough accuracy by leaving them at the default values. If you have changed settings and want to reset to the default values, you can click "Reset to Default". This will also reset the Shipping Address, so please remember to set it again, if needed.
 Please take note of the option Use Account based-rates (may include special discounted prices). When testing, the rates shown might be much higher than expected, or more than our previous integration. We recommend testing the rates with and without this option checked to see which rates you would like to display, as FedEx may be offering you large discounts on shipments based on your account.

With FedEx now setup, it is time to assign it to Shipping Methods.
Setup FedEx on Shipping Methods
- On your Web Store Manager, go to Fulfillment & Taxes -> General Set-up.
- Select the country, and scroll down to the Shipping methods
- Choose your FedEx shipping method, and click Change on the Shipping Integration
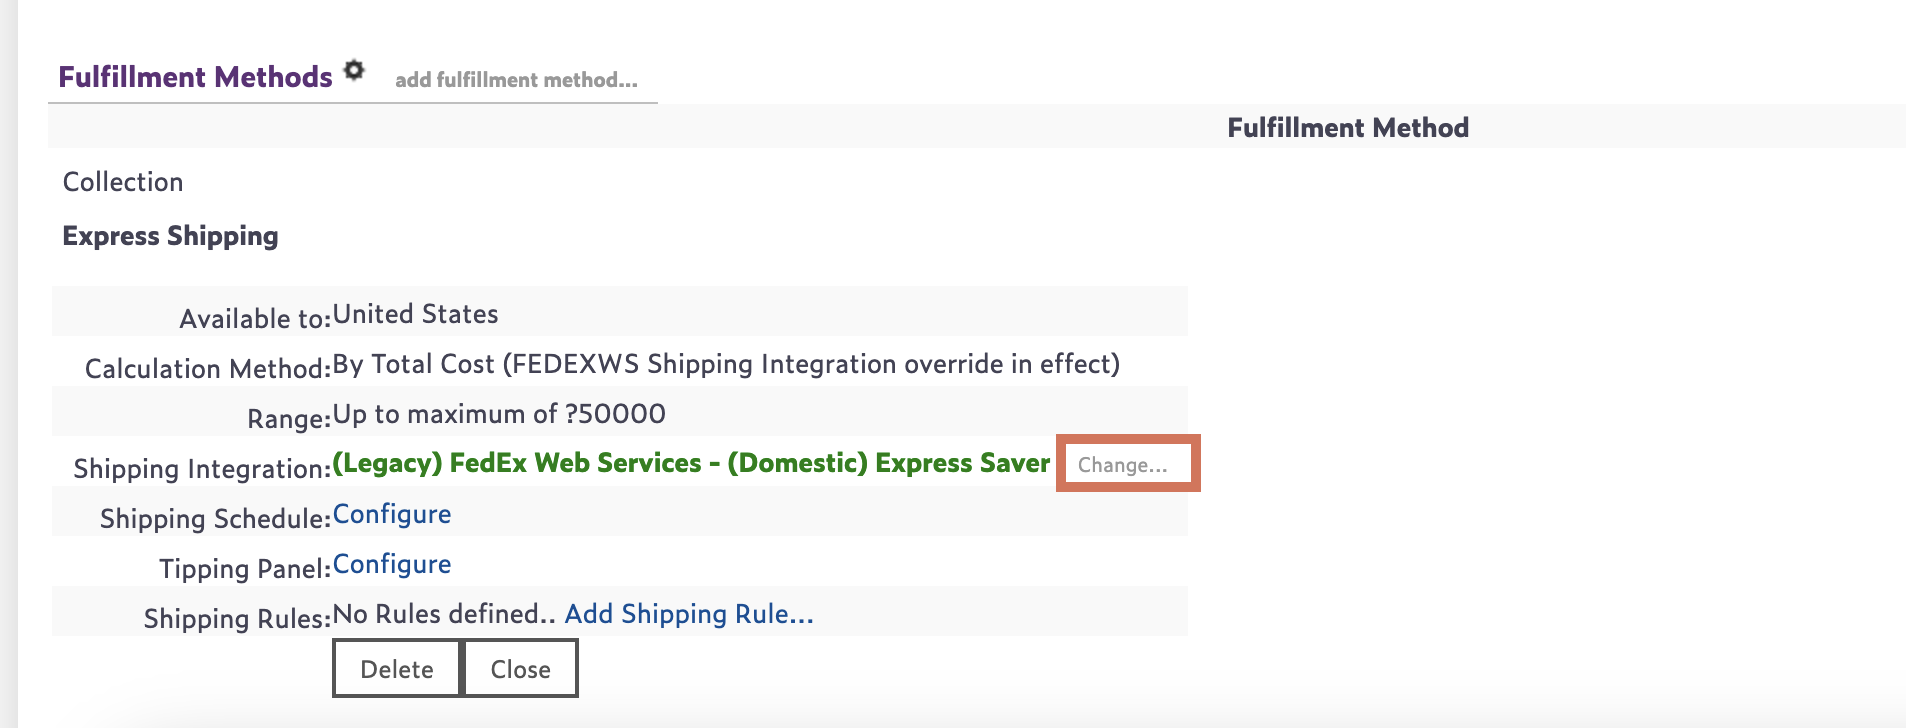
- Choose the Fedex Rates REST API, and then choose the specific service type. All services previously available in Web Services should be available for this new integration as well.

- Click 'Save Settings', and the shipping method is ready to be tested. We recommend you try testing without any shipping rules at first, to ensure that the shipping method is working correctly.


Common Issues
We recommend you contact us with any issues you face setting up or using FedEx. Below are some common queries which you may face when setting up and testing the integration.
The rate shown does not match what is shown on fedex.com / Fedex Web Services.
The online calculator on FedEx uses standardised average rates, and so there will be a small difference between the rates. We recommend looking at the Rate Options and check the product weight in your store basket, and ensure you are comparing with the same options. Fedex Web Services does not directly carry over all of their options either, and so there might be small differences in the rates. We recommend testing the option Use Account based-rates (may include special discounted prices), as Web Services uses Account-based rates when possible (note that account-based rates may be as low as 75% of the standard rate).
Certain Shipping Methods are not working / not available which worked on Web Services
FedEx Rates API is a new integration, and so there may be some differences between the services. Please contact us if the error persists, as FedEx may have dropped support for some service types.
Checkout Error based on Shipper/ Origin Address
e.g Shipper Postal-State Mismatch, Shipper Country Invalid, Origin postal code is required or invalid
This is most likely because the address set up on your WSM is invalid. Check the Shipper Address in your configuration to confirm the address is correct. The address is automatically pulled from your POS settings, however if it is not correctly configured, it may be blank. Contact us if the issue persists.
Freight services are not available on an order.
The freight services are only available under certain restrictions, especially that the order weight must exceed 150.01 lb. The freight API should have been checked, and the setting "Do you plan on shipping with Freight LTL" should also have been checked. Contact us if the issue continues, even with orders that meet the requirements.
Certain addresses can't be used for rates
Please contact us by opening a ticket and providing the specific customer address and the shipping methods. It is possible there is a misconfiguration on your account which may need to be fixed.