You can create or edit menus by logging in to your WebStore Manager, and clicking on Menu Builder. The menu builder is very powerful tool that lets you rearrange, add, and remove elements from your webstore's navigation.
Menu Builder
The menu builder is divided into two sections: Add Menu Items and Menu Structure Preview. 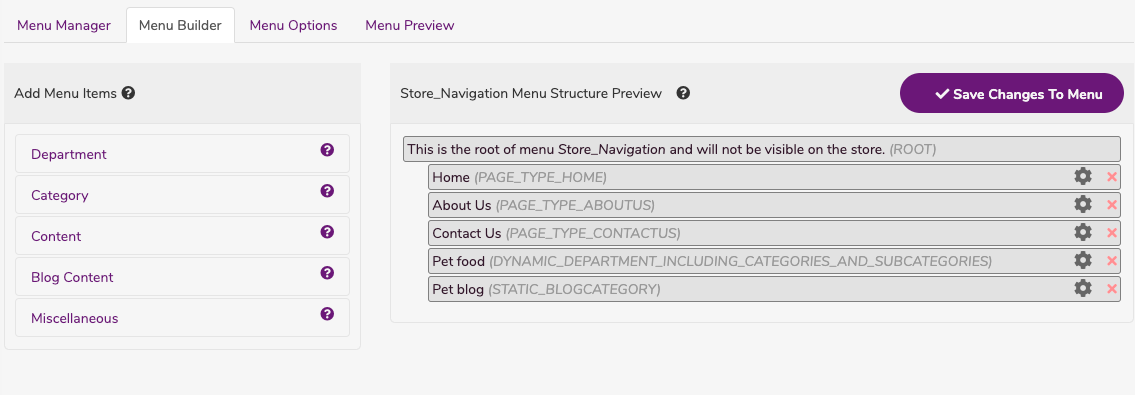
How to add menu items
- This panel presents all parts of your store that you can link to.
- It is from these store elements that you can select elements that you wish to appear in your menu.
- The various elements that you can add to your store are grouped (Department, Category, Subcategory, Content, Brands and Themes, Blog Content, Miscellaneous).

- Click a group and select your menu content.
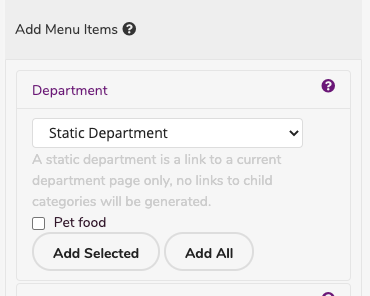
- Choose the type of content you want to add: Static or Dynamic.
- Click Add Selected to add specific menu content to your menu structure on the right.
- Click Add All to add all the available content within that group to your menu structure.

Static or dynamic
- A static department is a department the will appear as a single link.
- No additional link or child categories will be generated.
- A dynamic department can generate multiple links or child categories.

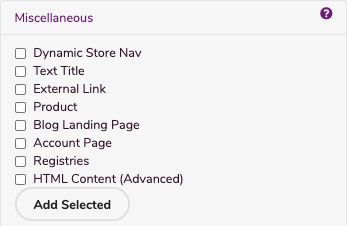
Miscellaneous
- Contains a list of commonly used links such as Registries, Account Page, and the default Dynamic Store Navigation.

Dynamic store nav
- Including this in your menu is a short cut to adding all departments with all their categories and all their subcategories to your menu.
- This is dynamic menu content and therefore cannot have any children.
Text title
- This allows you to enter text into the menu that isn’t a link.
- It is useful when grouping various menu content together into logical groups.
External link
- This will allow you to attach a URL to your menu.
- In the menu, content configuration panel is a special input called URL.
- Enter a URL to any URL on the web and the link will be displayed in your menu.
- This is useful if you want to redirect customers to your store's social media.
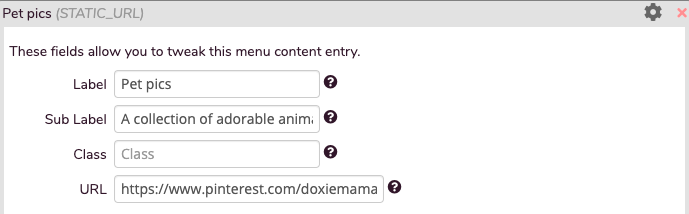

Note: Remember to enter a Label or the link won’t have anything to display on the menu.
Product
- You might want a special product to be easy to find, product will create a link to a selected product on your store.
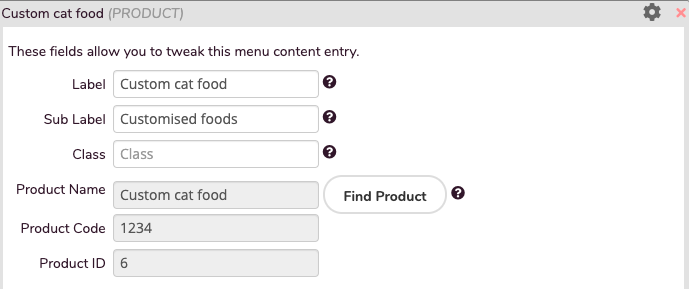
- When you add this to the menu, click Find Product to locate an item in your store.
- The link will display the product name unless you add a label.
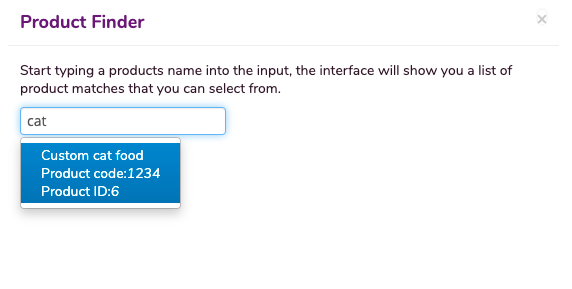
- The Product Name, Product Code and Product ID fields will automatically complete when you click Find Product.


Blog landing page
- Add the blog landing page to let your shoppers find your blog posts and articles quickly and easily.
Account page
- This will direct your customers to their account page.
- Here they can log in or register an account.
Registries
- This page will send customers to the lists & registries page.
- Here they can select to purchase items from a registry or set up a new registry.
Note: Shoppers must have an account with the store in order to set up a registry or list.
HTML Content
- This menu content will allow you to insert some HTML markup directly into a menu item
<li>. - This has the potential of breaking your store so ensure you test it VERY carefully when you use it.
Creating a new menu
To create a new menu, do the following:
- Enter the name of your menu.
- Menu names must start with a letter and contain no spaces.
- The name you choose will be used later when you insert the menu into your store so name it something sensible.
- Click Create.
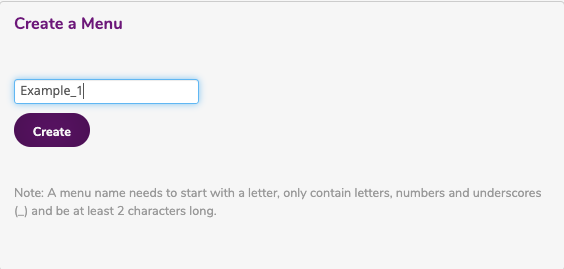

Note: A menu name can only contain letters, numbers and underscores. It must also be at least 2 characters long.
Editing a pre-existing menu
To edit a pre-existing menu, do the following:
- Select a menu from the drop-down.
- Select Edit.

- You can Delete a menu and remove it from your WebStore.
- You can Backup a menu and download it to your computer.
- You can then Restore a menu by uploading the backup file.

Warning: The interface comes with some pre-generated menus that are suitable for most stores. These pre-generated menus are used by the default store set-up and should not be deleted unless you have generated a suitable replacement and inserted this replacement into the relevant templates.